Sitecore: Set up Parse.ly tracking
The easiest way to get started with Parsely and Sitecore is to download and install the Parsely Connector package found here:
Once downloaded, install the package using the Sitecore Installation Wizard.
To activate the Parsely Tracking Tag, add the Parsely Tracker template to any Sitecore Template that you’d like to track:
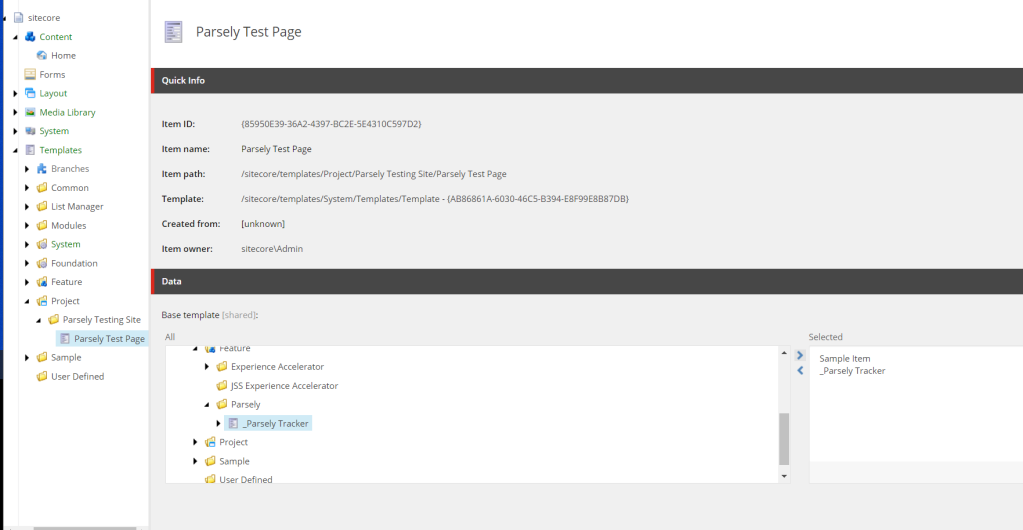
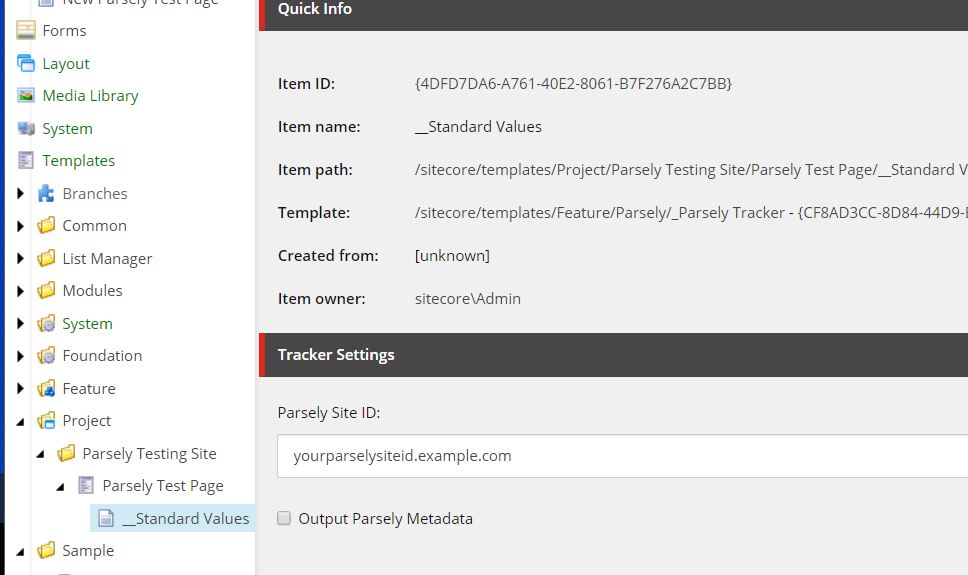
Once that’s done, those templates will have a “Parsely Site ID” attribute. Enter your Parsely Site ID value in that field:
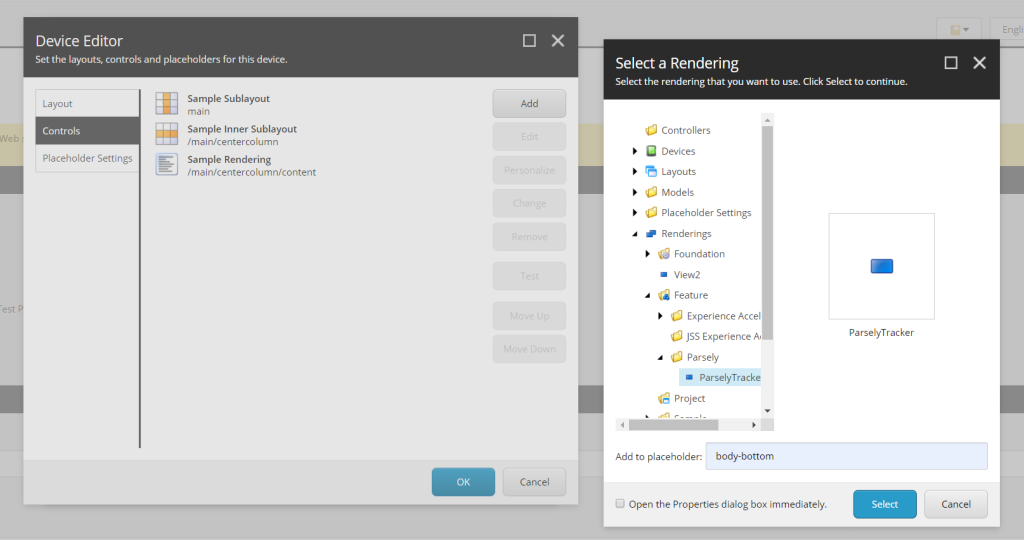
Next, attach the “ParselyTracker” rendering to the MVC layout of the layouts those pages use (we recommend placing the script tag at the beginning of the tag, but anywhere in the body is fine):
Once live, data should begin flowing into the dashboard!
Metadata
The Parsely Sitecore integration defaults should suffice for most installations: however, if necessary, the metadata defaults can be overridden.
The best solution to customizing Parsely metadata on a Sitecore installation would be to create a custom view rendering for your own business solution: Parsely’s solutions team can help you design and deploy that. A basic view rendering and template is provided, however, for overriding metadata quickly and easily from the Sitecore Content Editor itself.
To do so, attach the ParselyMetadataRendering using the above workflow to your header placeholder. Then, attach the _Parsely Metadata template to the templates you’re tracking using the same workflow as described above.
Once done, you can override the Parsely specific metadata tags in each Sitecore Item instance to control what metadata is exposed to the Parsely crawler.
Last updated: October 02, 2024