MCP server
The Parsely Model Context Protocol (MCP) server provides AI coding agents with direct, structured access to Parsely’s content across all your sites.
MCP Authentication
MCP authentication uses your existing dashboard permissions, permitting queries of multiple sites with a single authentication. API requires one API secret per API key.
What is the Parse.ly MCP server?
It is a hosted endpoint that exposes your Parse.ly data as a set of tools an AI assistant can call on your behalf. Connect once, authorize with your existing Parse.ly login, and the assistant can then read your analytics — scoped to exactly the sites and permissions your account already has.
- Endpoint:
https://dash.parsely.com/mcp - Transport: Streamable HTTP (JSON-RPC 2.0)
- Authentication: OAuth 2.1 with PKCE — no API keys to copy or paste
Why use it?
- No setup beyond a login. Authorize in your browser with the Parse.ly account you already have. Access is scoped to your existing site permissions.
- Your numbers, in the assistant. The same metrics you see in the dashboard — views, visitors, engaged minutes — answered conversationally.
- Built for AI. Tools and responses are structured so assistants can chain them: find a post, then pull its referrers, then compare to last month.
What can you do with it?
- Site overview — top-line views, visitors, and engaged minutes for today, this week, or this month.
- Real-time — a live pulse of who’s reading right now: concurrent visitors, top pages, and where they’re coming from.
- Traffic trends — daily, weekly, and monthly trends with month-over-month comparison.
- Top content — rank your top posts, videos, and pages by any metric over any time window.
- Top authors, sections & tags — rank authors, sections, tags, channels, and audience segments by any metric.
- Content search — find specific posts, videos, and other pages; break down by author, section, or tag.
- Post detail — deep analytics for a single post: its timeline, referrers, and engagement over time.
- Referrers — see where your traffic comes from across channels.
- Referrer drill-down — find which of your pages send traffic to any given page.
- Conversions — rank conversion labels by metric to see which content drives your goals.
- Goals — track your content goals and pacing: which are on track, which are behind, and each goal’s trajectory.
- Campaigns — query and search campaign performance.
- Headline tests — see which headline variants won and how your A/B tests performed.
- Network rankings — compare and rank every site in your network or group.
- Apple News — see how readers discover your content on Apple News.
- Saved groups — list and manage aspect groups.
- Docs search — ask product questions answered from Parse.ly’s own documentation.
Every tool runs with your permissions — the assistant can only see sites your account can already access.
Connecting
ChatGPT
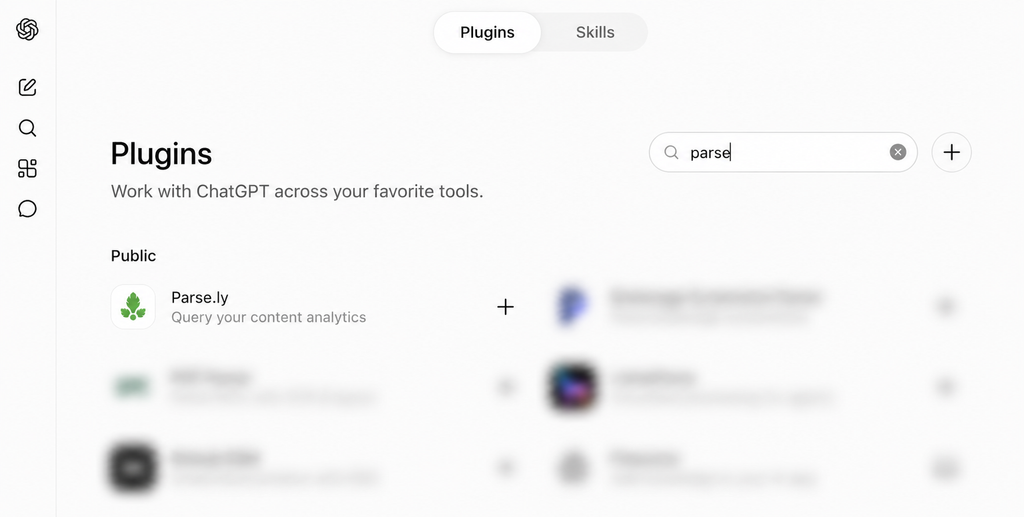
Parse.ly is an official ChatGPT plugin, so there’s no configuration file to edit and no URL to paste.
In ChatGPT, open Settings, then Plugins, then search for Parse.ly, and click + to connect it. ChatGPT will open your browser to authorize the connection. Log in to Parse.ly and click Authorize.
Claude
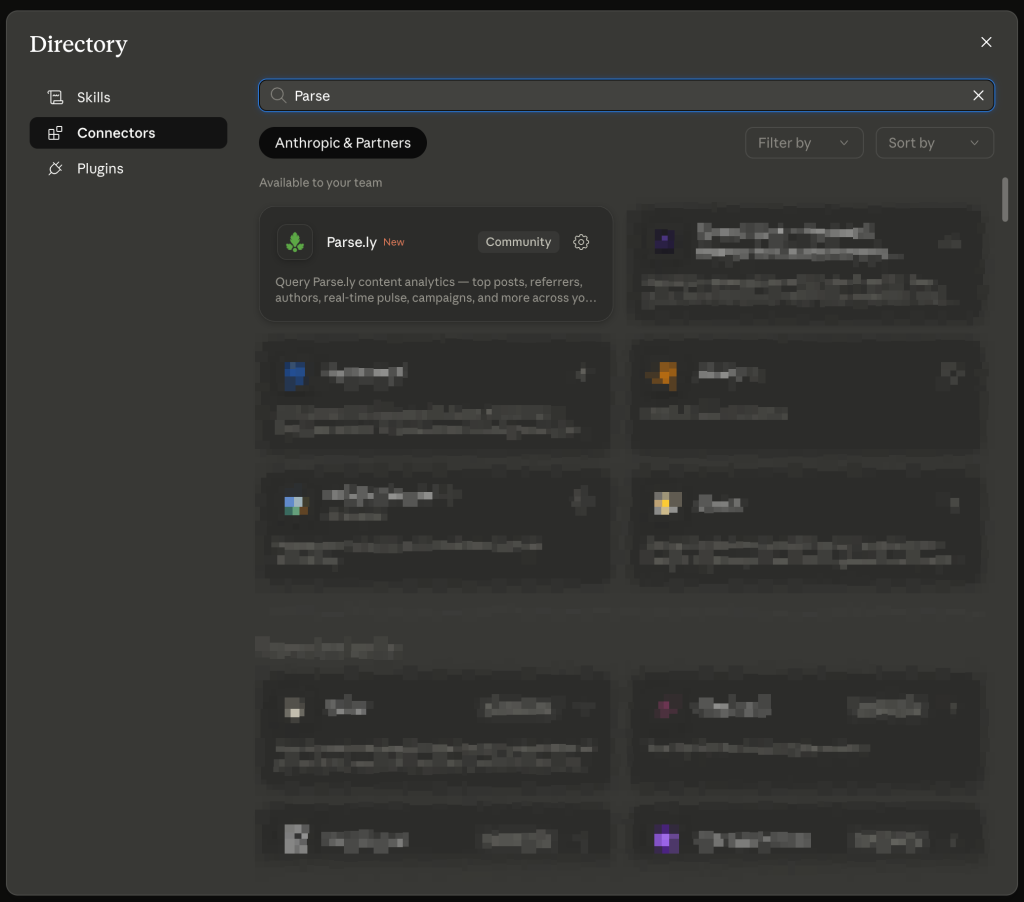
Parse.ly is an official Claude connector, so there is no configuration file to edit and no URL to paste.
In Claude, open Settings, then Connectors, then Browse connectors. Search for Parse.ly and click Connect. Claude opens your browser to authorize. Log in to Parse.ly and click Authorize.
Claude Code
claude mcp add --transport http parsely https://dash.parsely.com/mcp
Or add it to ~/.claude.json:
{
  "mcpServers": {
    "parsely": { "type": "http", "url": "https://dash.parsely.com/mcp" }
  }
}
On first use, Claude Code opens your browser to authorize. Log in to Parse.ly and click Authorize.
Claude Desktop without the connector
If you can’t use the connector, for example on a managed workspace where an admin hasn’t enabled it, Claude Desktop can reach the server over stdio using the mcp-remote bridge and Node.js 18 or newer.
Claude Desktop talks to MCP servers over stdio, so it needs the mcp-remote bridge and Node.js 18 or newer. Edit ~/Library/Application Support/Claude/claude_desktop_config.json:
{
  "mcpServers": {
    "parsely": {
      "command": "/absolute/path/to/node/bin/npx",
      "args": ["mcp-remote", "https://dash.parsely.com/mcp/"],
      "env": {
        "PATH": "/absolute/path/to/node/bin:/usr/local/bin:/usr/bin:/bin"
      }
    }
  }
}
Use absolute paths — Claude Desktop does not load your shell profile, so a bare npx may pick an old Node and fail. Restart Claude Desktop (Quit, not just close the window) after editing.
Codex CLI
OpenAI’s Codex CLI supports remote MCP servers over Streamable HTTP with OAuth, and it shares its MCP configuration with the ChatGPT desktop app and the Codex IDE extension. Add Parse.ly to ~/.codex/config.toml (or a project-scoped .codex/config.toml):
[mcp_servers.parsely]
url = "https://dash.parsely.com/mcp"
Run codex mcp login parsely to open your browser and authorize — log in to Parse.ly and click Authorize.
Microsoft Copilot Studio
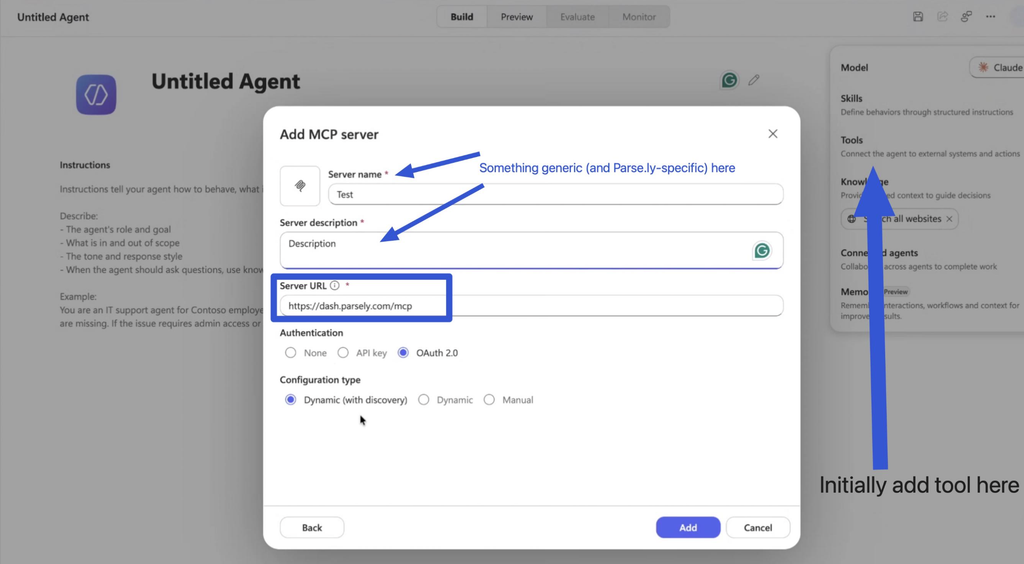
To connect Parse.ly in Microsoft Copilot Studio, create or open an agent. Under Tools, click +, then select Model Context Protocol (MCP) and choose Add → Model Context Protocol (MCP).
Enter a name and description for Parse.ly, then use https://dash.parsely.com/mcp as the Server URL. Select OAuth 2.0 for authentication and Dynamic (with discovery) for the configuration type, then click Add.
Under Select a connection, open the connection menu and choose Create new connection. Follow the authorization flow to sign in to Parse.ly and connect your account.
Parse.ly will soon also be available directly through the Microsoft Copilot Studio connector catalog, so this manual MCP setup will no longer be necessary.
Microsoft Copilot CLI
In GitHub Copilot CLI, enter /mcp and select Add a new MCP server. Give the server a name such as Parse.ly, select HTTP as the server type, and enter:
https://dash.parsely.com/mcp
Leave HTTP Headers empty, use * to make all Parse.ly tools available, and keep Defer Tools set to Auto. Save the server.
Copilot will detect that Parse.ly requires OAuth authentication. Press Enter to authenticate. Your browser will open automatically; log in to Parse.ly and click Authorize. If the browser doesn’t open, Copilot provides an authorization URL you can open manually.
Other clients
Any client that supports a remote MCP server over streamable HTTP can connect to https://dash.parsely.com/mcp. Clients that only support stdio can use mcp-remote as shown above.
FAQ
How is my data protected?
You authorize with your normal Parse.ly login over OAuth 2.1. The server never sees a password, and every request is scoped to the sites and permissions on your account. No API secrets are shared.
Does it support Streamable HTTP?
Yes. The endpoint uses MCP’s streamable HTTP transport with JSON-RPC 2.0.
I’m getting authentication errors after about an hour.
Access tokens last one hour. Most clients refresh automatically; if yours does not, reconnect the server. For Claude Desktop, clear the cached token (rm -rf ~/.mcp-auth) and restart.
Claude Desktop fails with “ReadableStream is not defined”.
The mcp-remote bridge is running under Node.js below 18. Point command and env.PATH at a Node 18+ binary, clear the npx cache (rm -rf ~/.npm/_npx/*), and restart.
The authorization screen never appears.
Make sure you are logged in to Parse.ly in the same browser first, then retry the connection.
Last updated: September 23, 2026