WordPress plugin
To integrate Parse.ly content analytics into your WordPress website without any extra integration work, use wp-parsely. This plugin automatically injects the Parse.ly content analytics tracker and metadata into your website’s pages. The plugin’s settings pages enable convenient customization.
Installation
Installation steps differ depending on your setup. Pick the one that applies to your case.
WordPress VIP customers: Contact your account representative(s) and Parse.ly will install the plugin for you.
WordPress.com customers: Contact Parse.ly Support to ask for help.
For all other cases (regular WordPress installations):
- Visit the “Plugins” page in your WordPress dashboard and click “Add New” at the top of the page.
- Search for “Parse.ly” using the search bar on the right side. The wp-parsely plugin should appear in the search results.
- Click “Install Now” to install the plugin.
- After completing installation, click the “Activate” button.
Decoupled set up: regardless of your hosting situation, it’s possible to use the plugin with a different front-end application.
- Follow the configuration instructions.
- Review our decoupled instructions.
Configuration
Basic settings

Required: Site ID
Now that wp-parsely is installed and activated, complete the initial configuration for it to work.
- Navigate to the Parse.ly settings page in the WordPress dashboard (under the “Settings” menu).
- Fill in your Site ID.
Optional settings
- Parse.ly API Secret (optional, not visible to new WPVIP customers). The Parse.ly API Secret is optional and only available to customers who have purchased the Parse.ly API. The Parse.ly API Secret is required for using Content Intelligence. If you have purchased the API, find your API Secret in the Parse.ly Dashboard under the “API Settings” menu item. If you have not purchased the API and would like to do so, email your account manager.
- Metadata Format: Select a metadata format. Parse.ly recommends repeated metas.
- Logo: If you have a logo you want to add, specify the logo URL by using the Browse button to the right of the Logo setting.
- Track Logged-In Users: Select whether to track logged-in users. Logged-in users are people on your team who are creating content from within WordPress.
- Disable JavaScript: Select whether to use the Parse.ly plugin to load the JavaScript tracking on your site.
Click the “Save Changes” button after making changes to this, or any other plugin settings, page.
Content Intelligence settings
Manage user access for AI-powered features from the Content Intelligence tab. AI-powered features are only available to WPVIP customers. Read more about these settings in the WPVIP documentation.

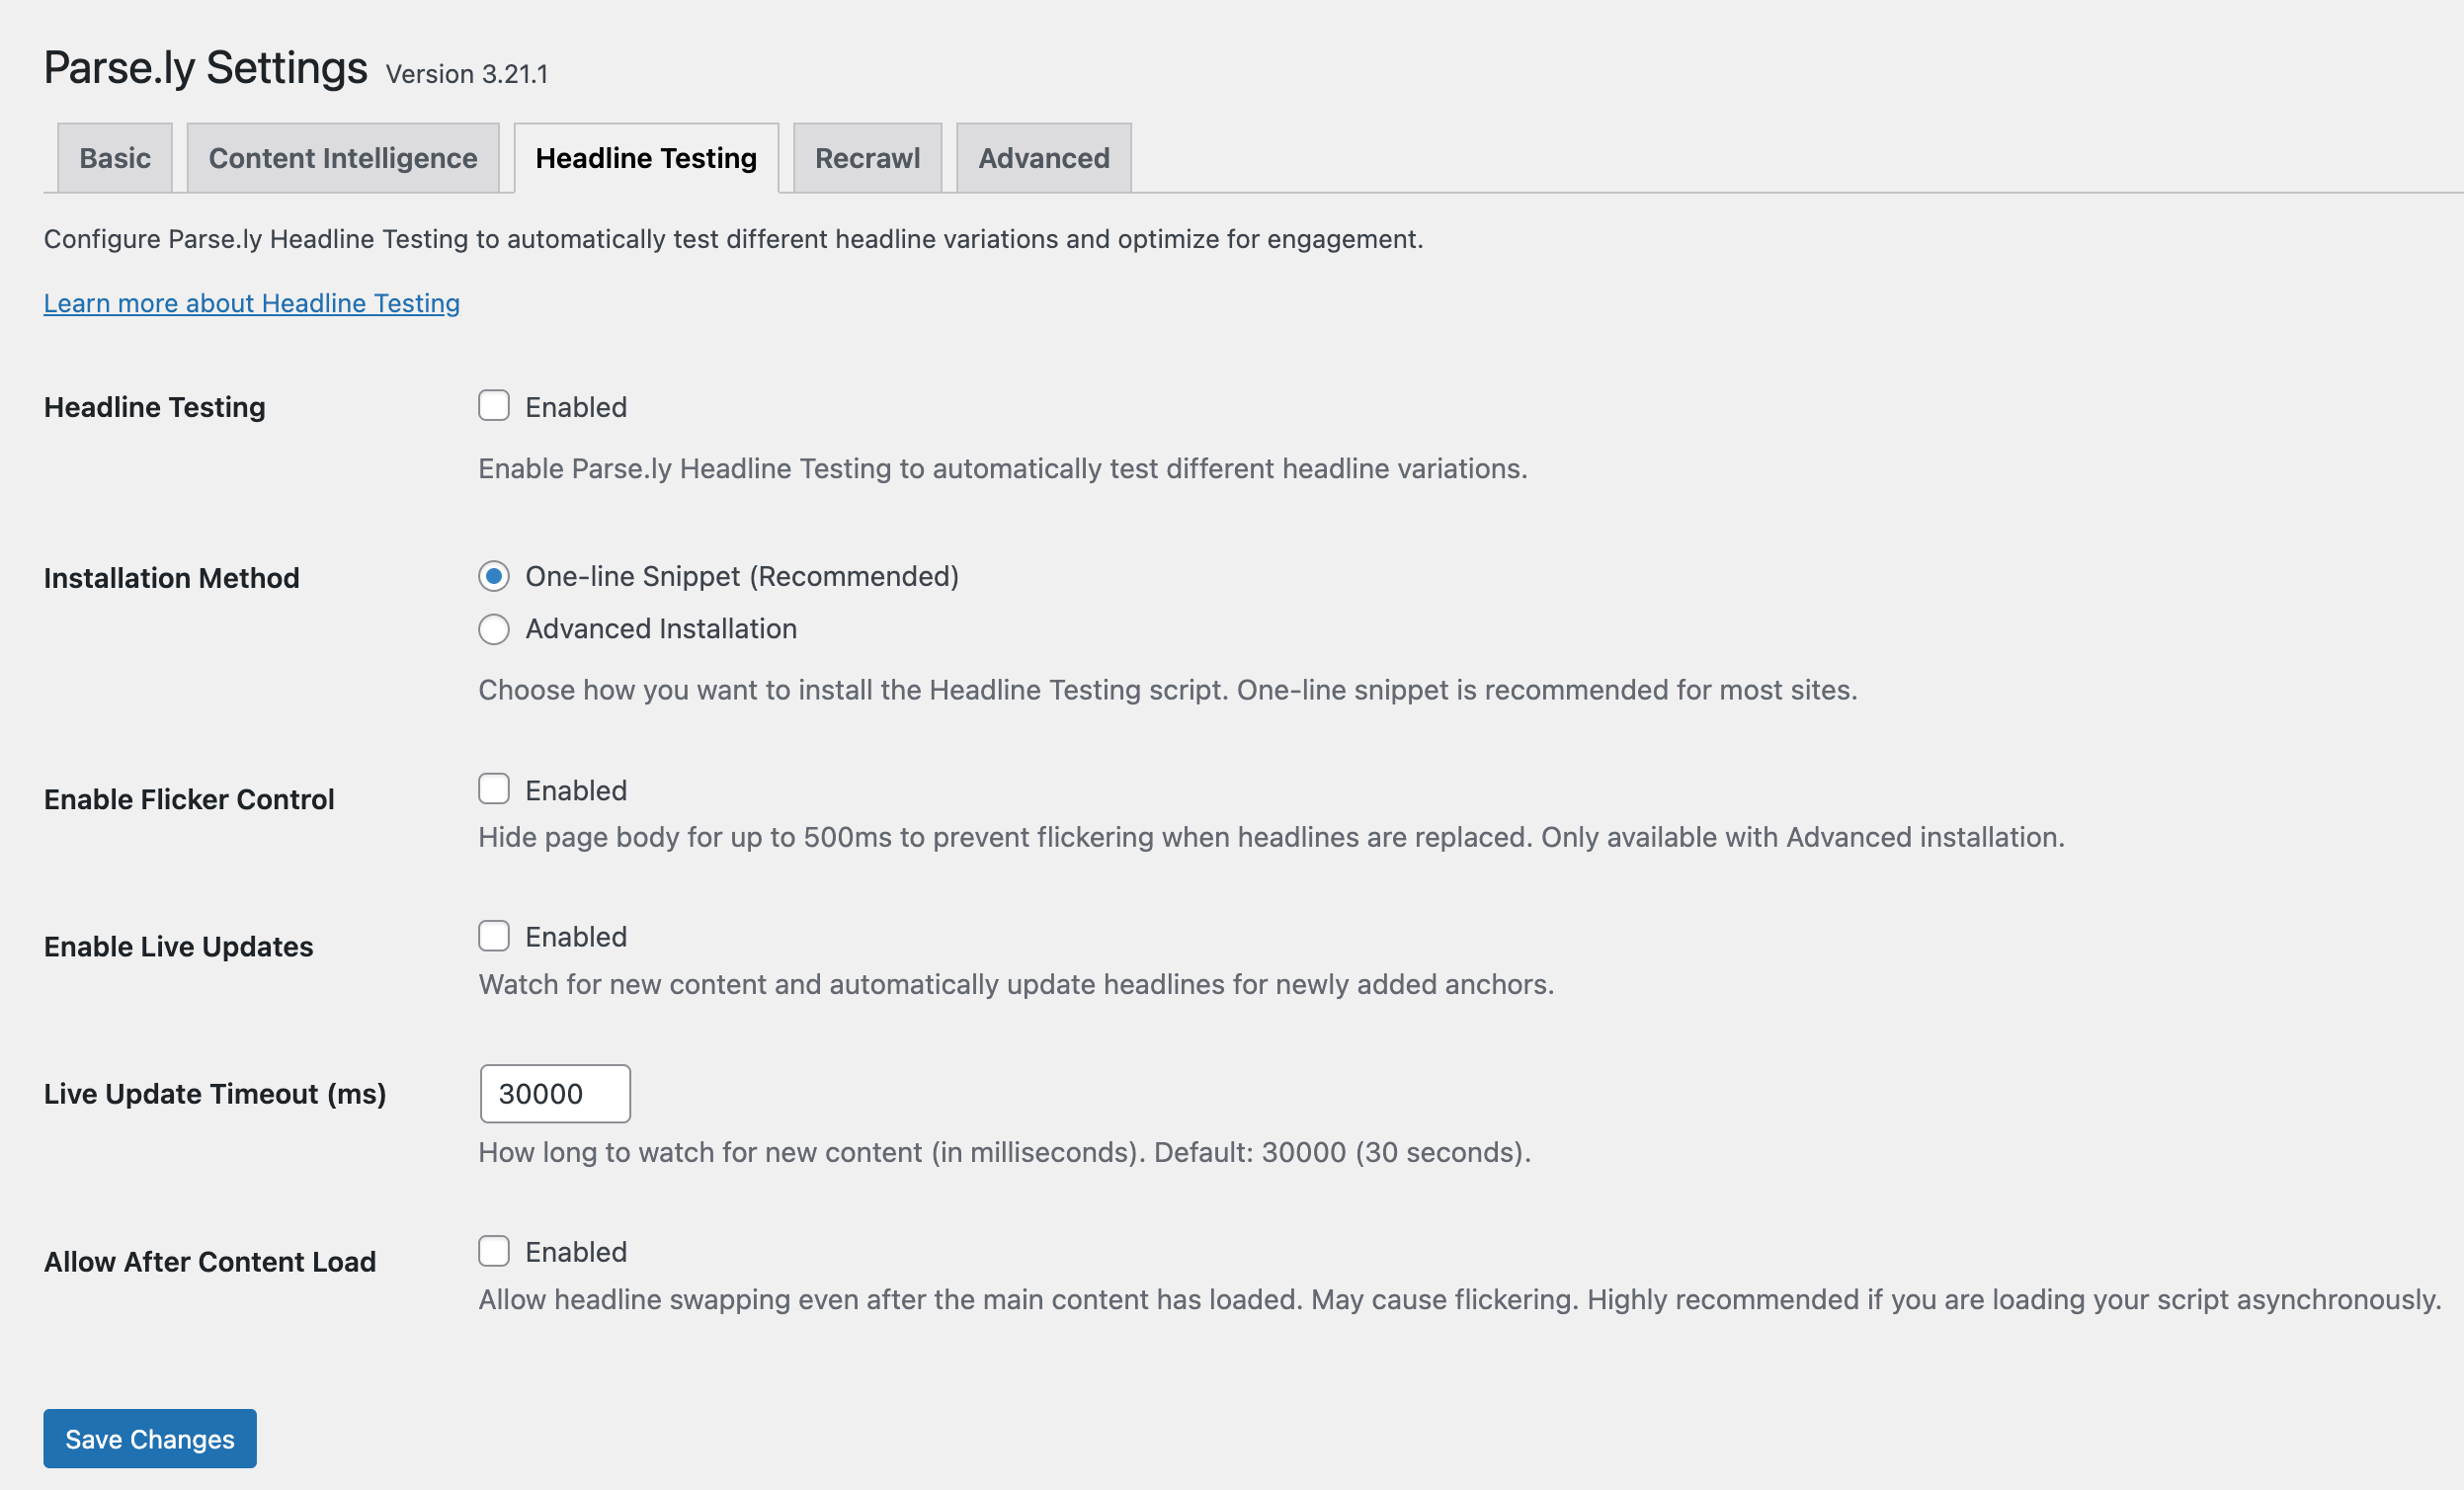
Headline Testing settings
The Headline Testing tab can install the Headline Testing script onto your site. Doing so will enable your team to create tests from the Headline Testing page in the Parse.ly Dashboard.
Recrawl settings
The Recrawl tab is so named because these settings modify the on-page metadata, which may warrant a recrawl. Recrawling is not required if modifying these settings during the initial setup.
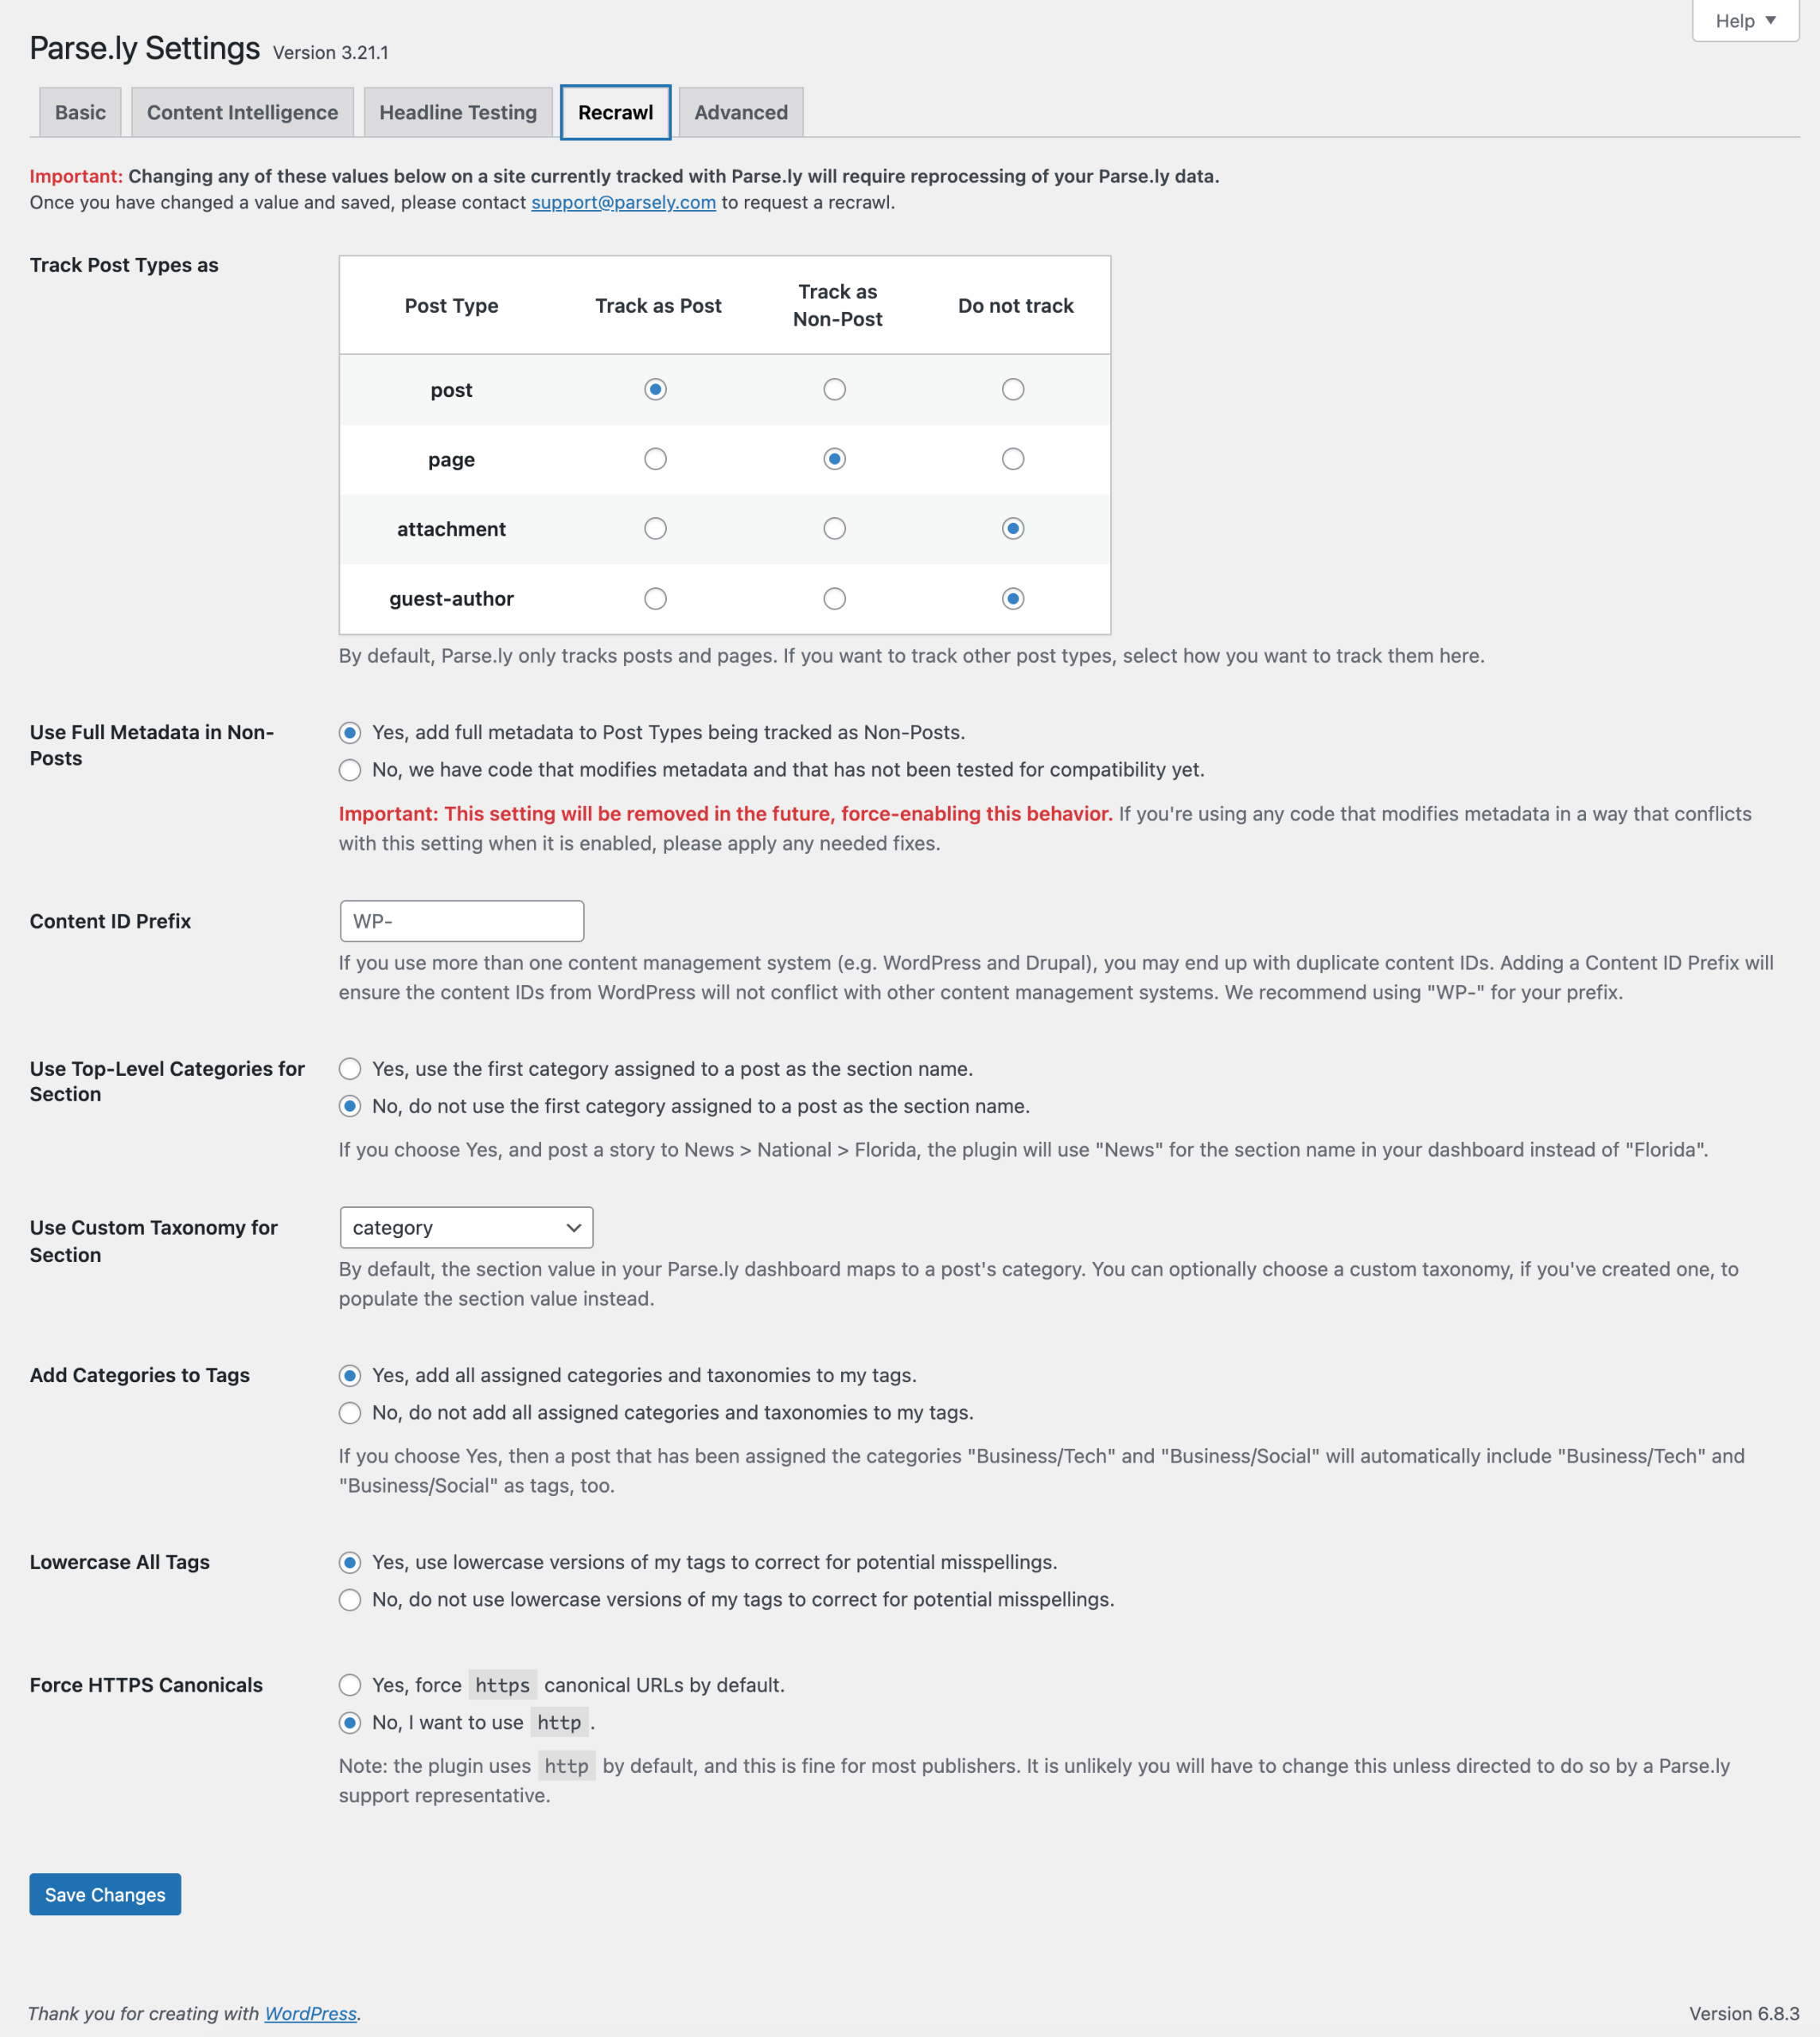
Track Post Types as
Parse.ly tracks posts (as posts) and pages (as non-posts) by default.
If your site contains Custom Post Types, Parse.ly recommends reviewing this setting since the plugin may not be able to categorize them automatically.
Use Full Metadata in Non-Posts
This setting supports a feature request discussed in a Github issue. In short, the request is for the plugin to provide metadata support for non-posts like it already does for posts. Some publishers may have developed metadata solutions that conflict with the update we made to the plugin. Therefore, Parse.ly provides this opportunity to toggle the new functionality while resolving potential conflicts.
Handling WordPress categories in Parse.ly
WordPress permits the use of multiple categories. However, Parse.ly will only accept one section value. There are multiple ways of handling this situation:
- Adjust the Use Top-Level Categories for Section setting.
- Choosing
Yes...selects “News” from a post categorized in News > National > Florida. - Choosing
No...selects “Florida” from a post categorized in News > National > Florida.
- Choosing
- Select an alternative to
Categoryfrom the Use Custom Taxonomy for Section setting. - Add Categories to Tags to capture all of your categories in a tag format.
- WordPress developers may also use one of the predefined filters to customize the section value.
Advanced settings
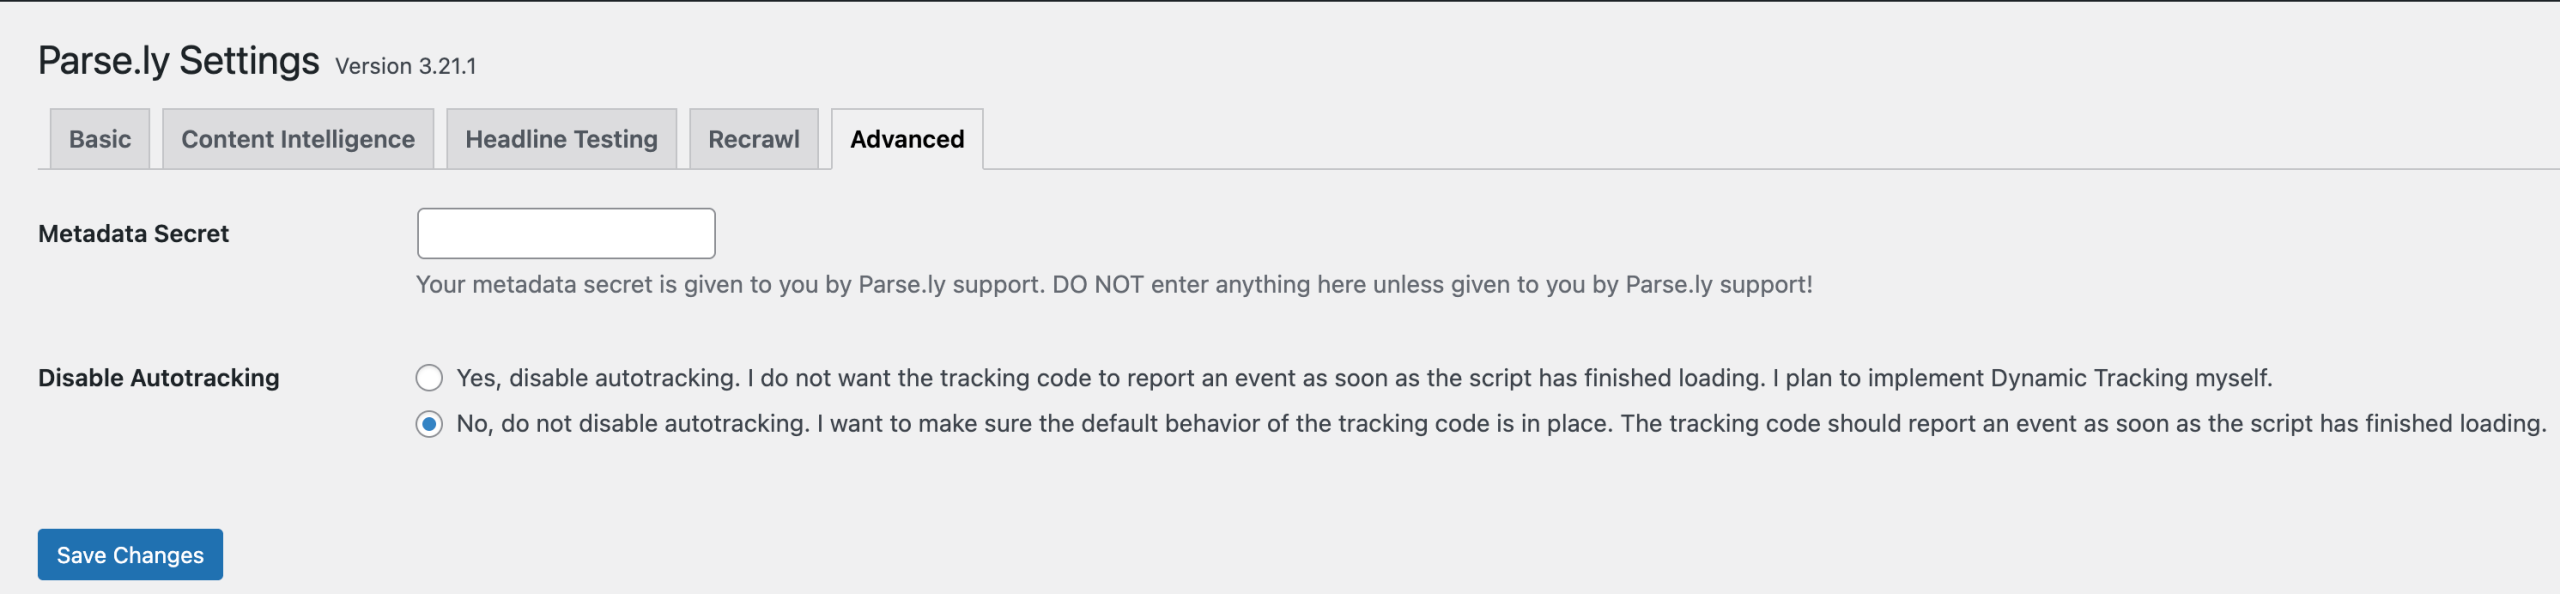
Parse.ly Metadata Secret (optional, not visible to new WPVIP customers).
This is a key given to you by Parse.ly support. Do not input any data in this field unless instructed to do so by the Parse.ly support team.
Next steps
- If you need to customize when the tracker fires page view events (sites with dynamic content like SPAs), review the dynamic tracking documentation.
- Follow the testing instructions and metadata review guide to ensure expected results.
- If it’s necessary to modify the behavior of the plugin, review customization options.
- Experiencing an issue not addressed in the FAQ page? Review troubleshooting steps.
Last updated: July 20, 2026