Single Sign-On (SSO) setup and integration
Parse.ly offers a couple of options for securing your organization’s account with single sign-on (SSO). SSO can enable you to manage account permissions through your identity management service.
Before you begin
Ensure that you’ve purchased SSO capabilities by reviewing your contract. Contact your Relationship Manger with questions.
Adding and removing users
Create and delete user accounts for your Parse.ly dashboards via our user management instructions.
User accounts must exist in Parse.ly Dash to use single sign-on. The use of SSO enables the management of existing account permissions but does not substitute account creation for Parse.ly Dash.
Authentication Methods
Selecting an authentication method
- Log into your dashboard
- Click the Account Management silhouette icon 👤

- Select “Users”
- Click the gear icon ⚙️
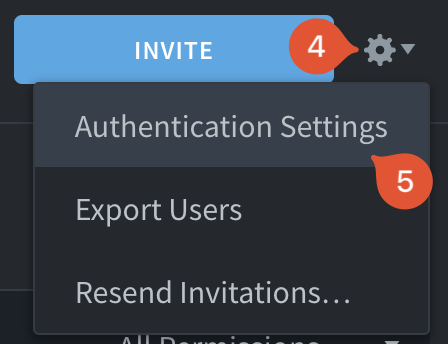
- Select “Authentication Settings”
- Click on the drop-down menu.
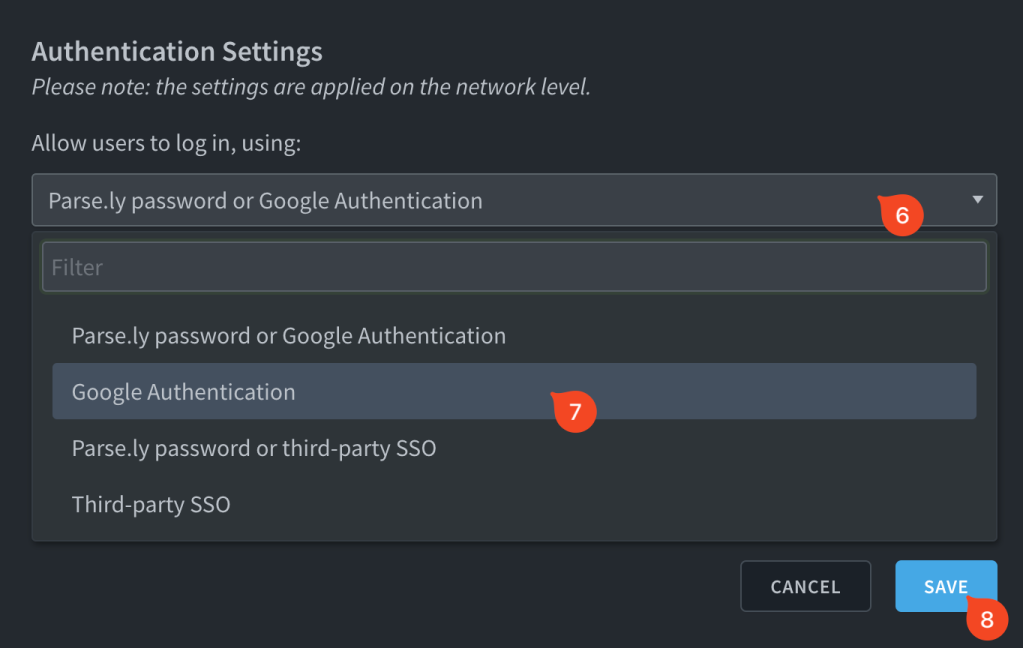
- Select your preferred option
- Click “Save”
Parse.ly Password or Google Authentication
This is the default selection for all new customer accounts.

Google Authentication
Organizations using Gmail can force users to log in with their Google accounts.

Third-party Authentication
Organizations can integrate Parse.ly with third-party identity providers like Okta or OneLogin using SAML 2.0.
You may select either:
- Parse.ly password or third-party SSO
- Third-party SSO
Both will provide the same settings screens. However, we recommend selecting the option that permits the Parse.ly password until you’ve verified the identity management service is working.

- Once here, copy metadata from your identity provider and paste it into the text box.
- Click Save.
On this screen you will also find the following information:
- Audience ID:
Parse.ly- Also known as “Audience URI” and “Entity ID”
- Single Sign On URL:
https://dash.parsely.com/[your-publisher-name]/auth/- Your publisher name will populate automatically in the provided field.
- We don’t have a separate “Recipient URL” nor “Destination URL”, use the “Single Sign On URL” for all three fields, if required.
- We don’t expect this URL to resolve to anything. If you attempt to navigate to the provided URL, expect to see “Server Error (500).”
More help
- Add/Remove/Modify Parse.ly users
- Troubleshoot dashboard loading / login issues
- If all else fails, contact support@parsely.com
Last updated: June 05, 2025