Create a new report
The mechanics of creating a report in the Parse.ly Dashboard are generally the same for all report types, with the exception of the Details report, which by default makes use of the custom report builder. All reports begin from the Reports tab of the Dashboard.
Steps to create a new report

- Visit Reports in the Dashboard.
- Click “Create Report.”
- Select a report type from the options presented.
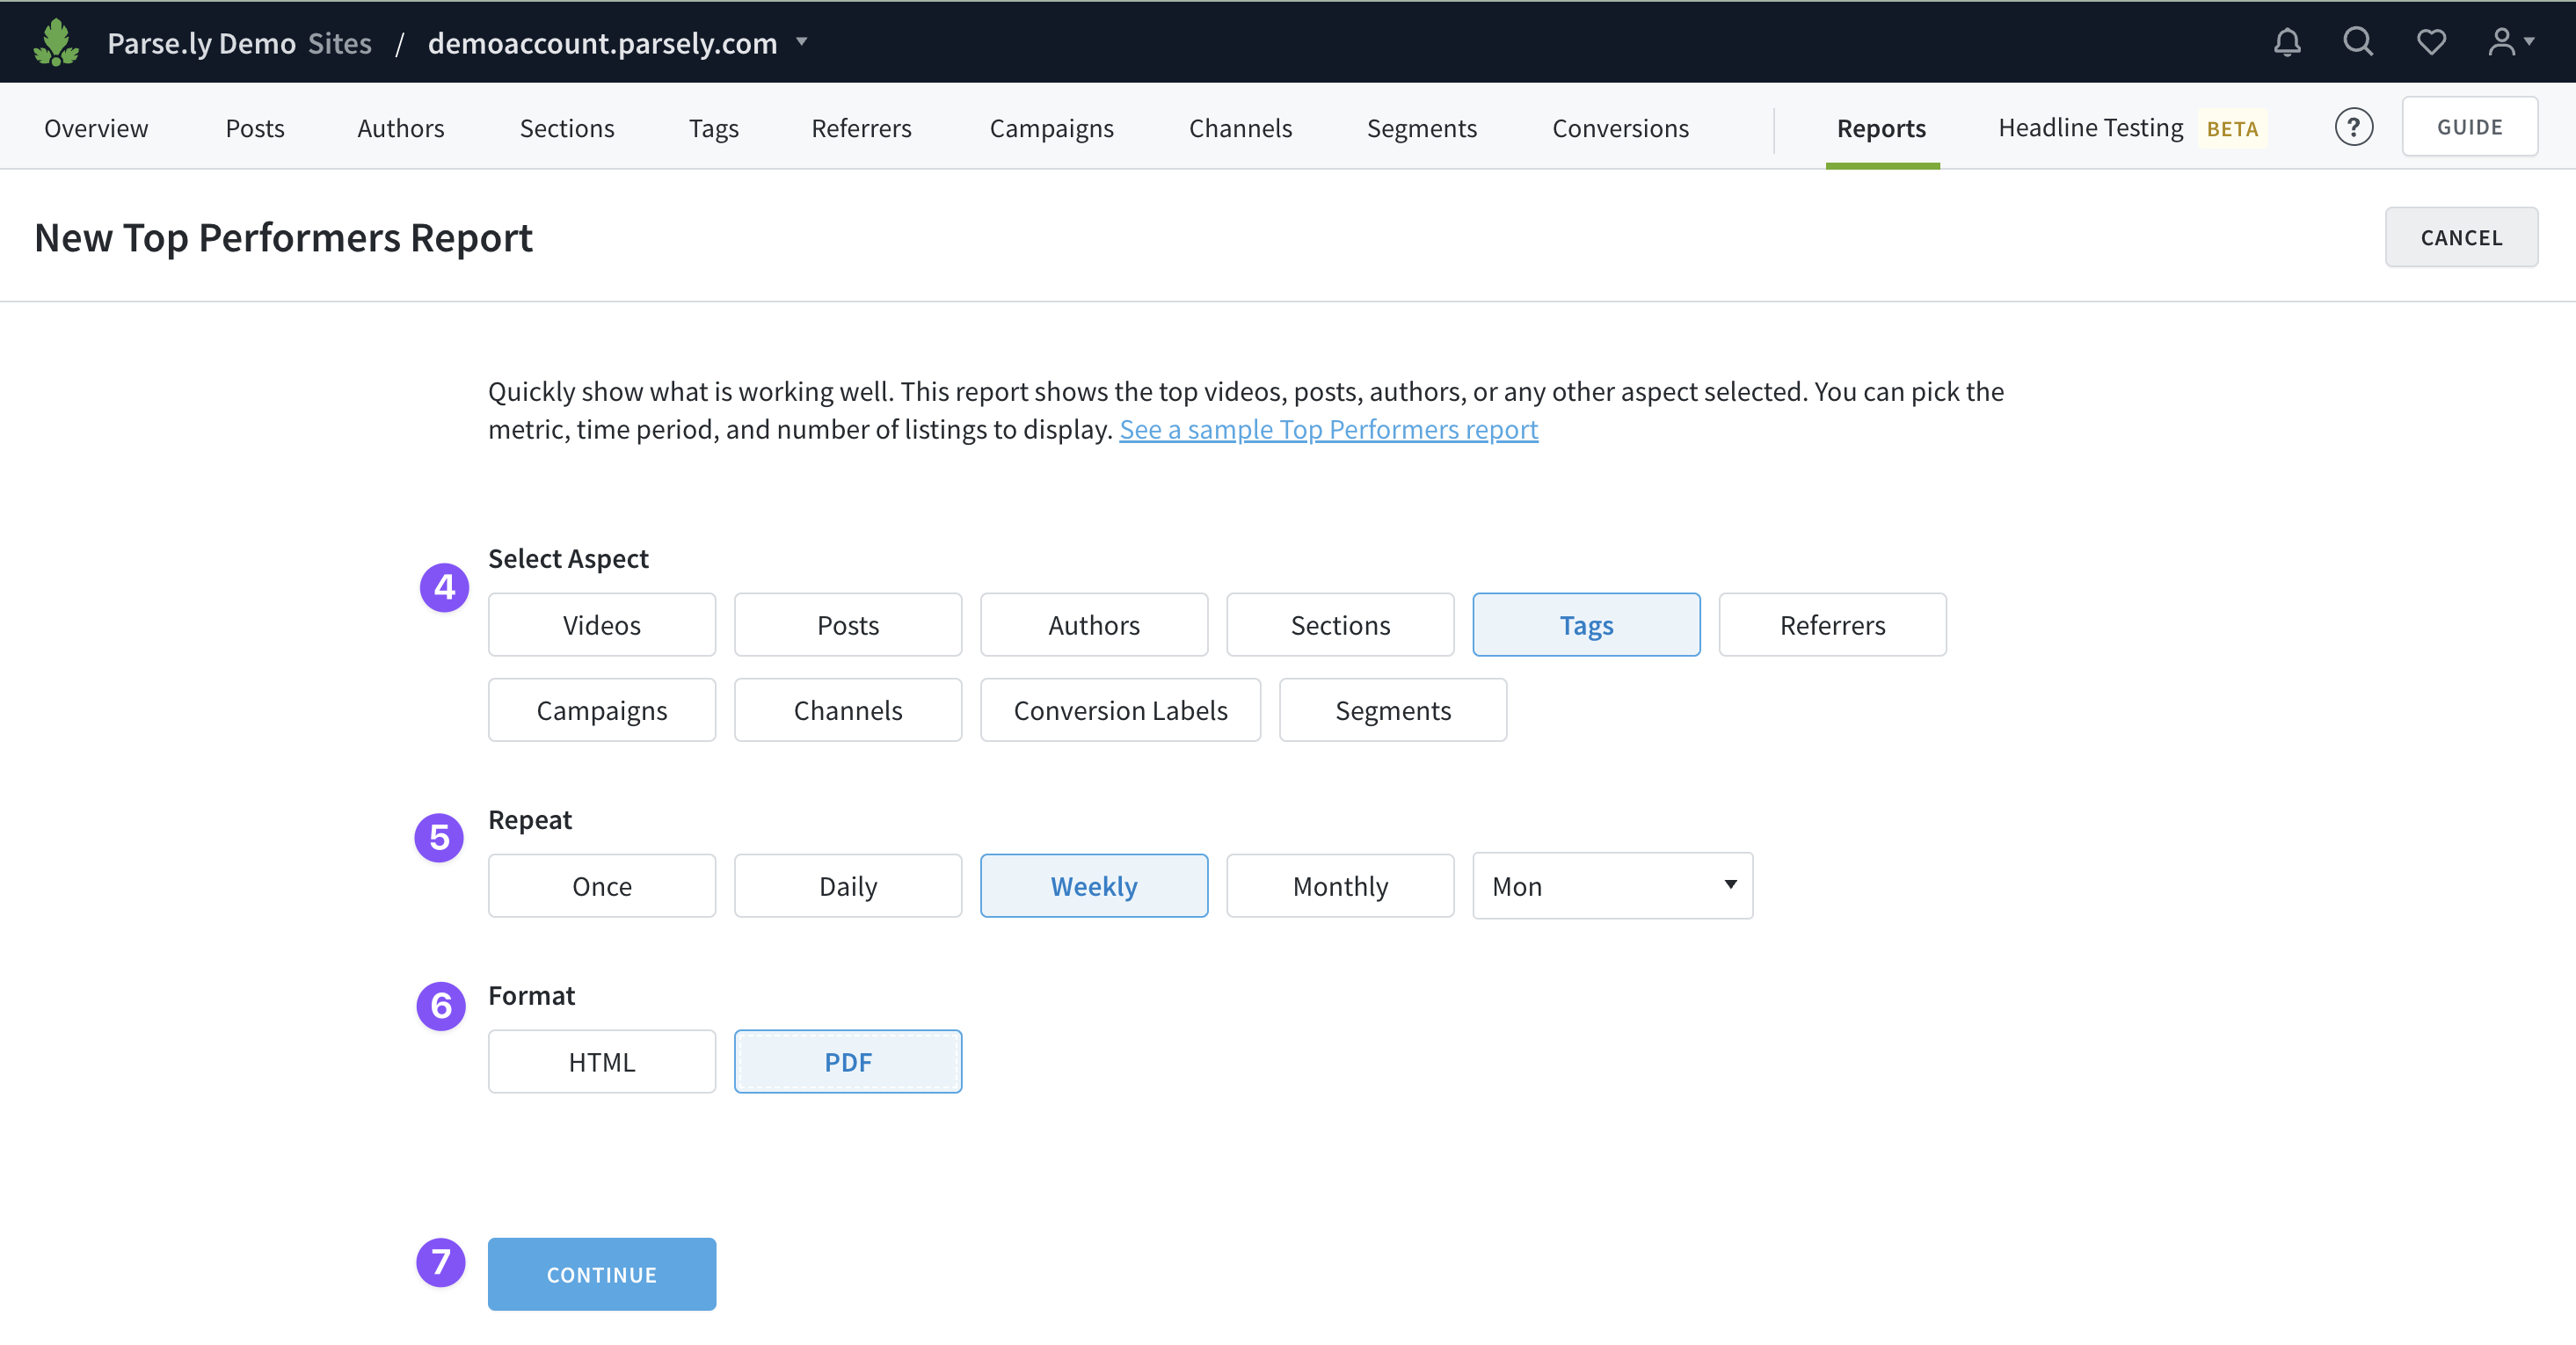
- Select the aspect (the subject of the report).
- Select how often you want to repeat and receive the report.
- Choose the file format for the report.
- Click “Continue.”

- Choose the parameters for the report.
- Set any desired filters for the report.
- Enter email addresses for everyone who should receive a copy of the report. Your email address is automatically included. Separate email addresses using commas or by entering each on a new line.
- Enter a report summary — or leave this option blank to use an auto-generated summary.
- Click “Save.”
Last updated: July 08, 2025