Creating, viewing, and editing groups
Create author, conversion, referrer, and tag groups
From the Authors, Conversions, Referrers, or Tags tab of the Parse.ly Dashboard, click Author Groups, Conversion Groups, Referrer Groups, or Tag Groups to list existing groups. Then click the “Create New Group” button.
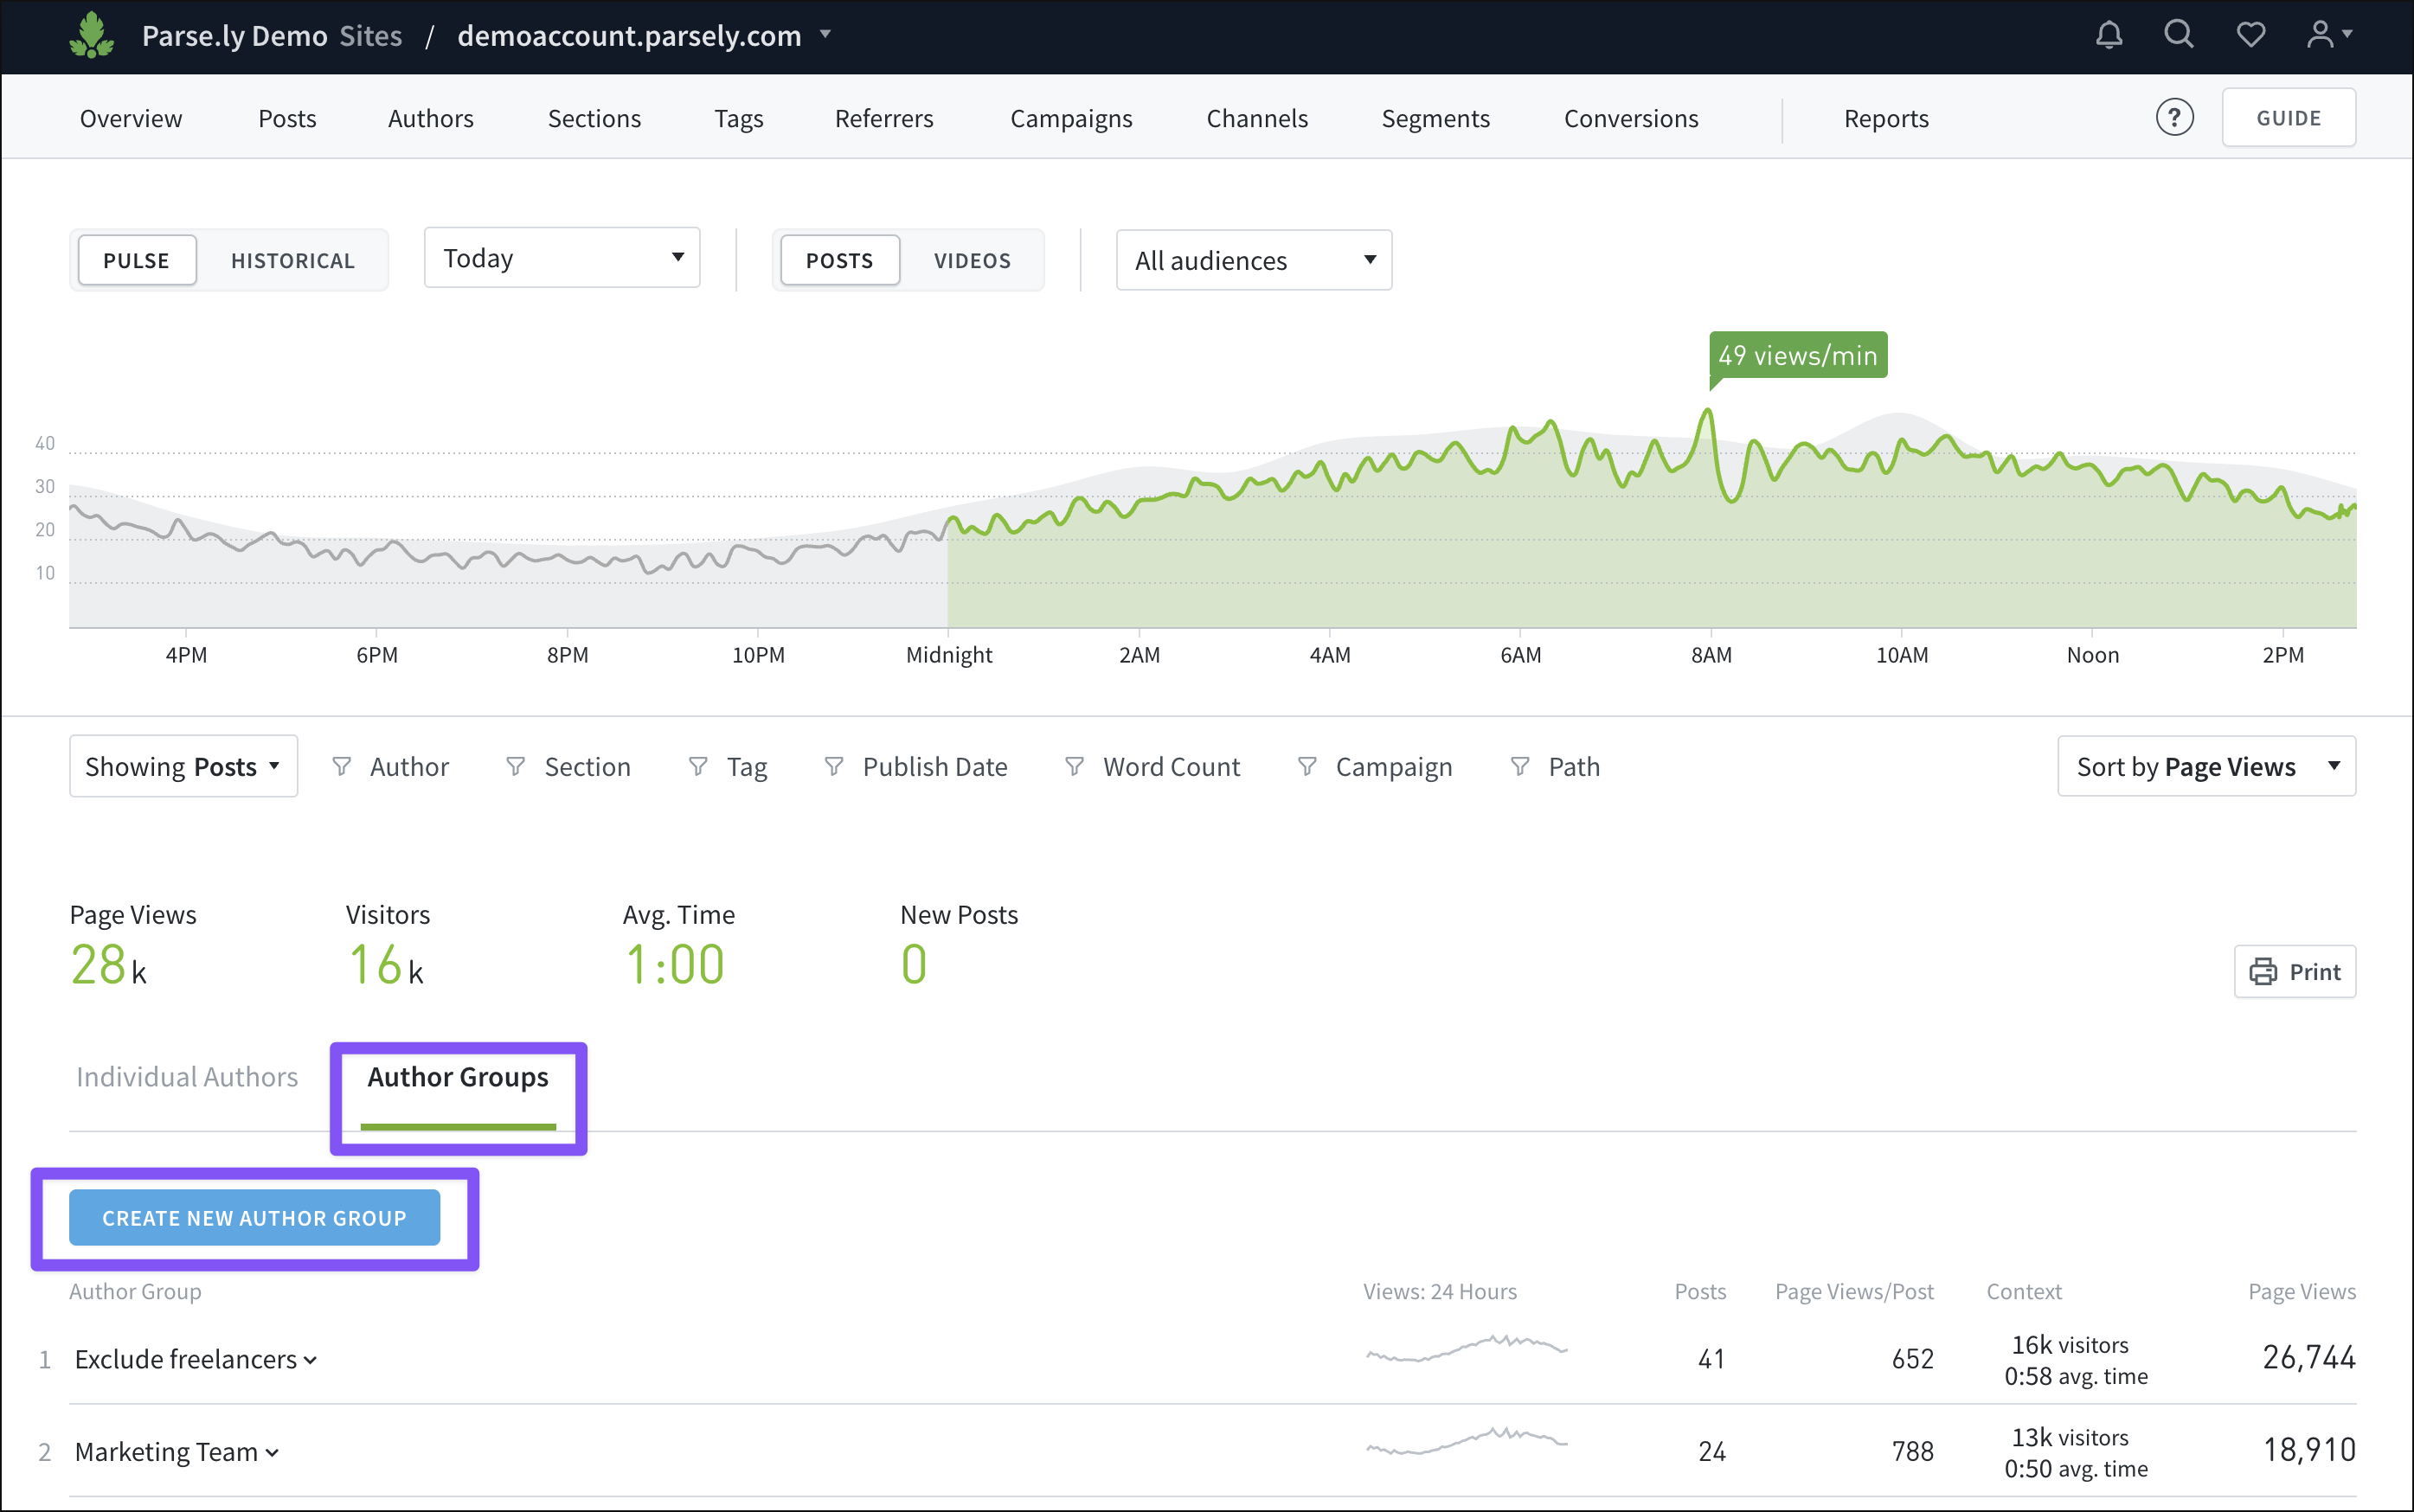
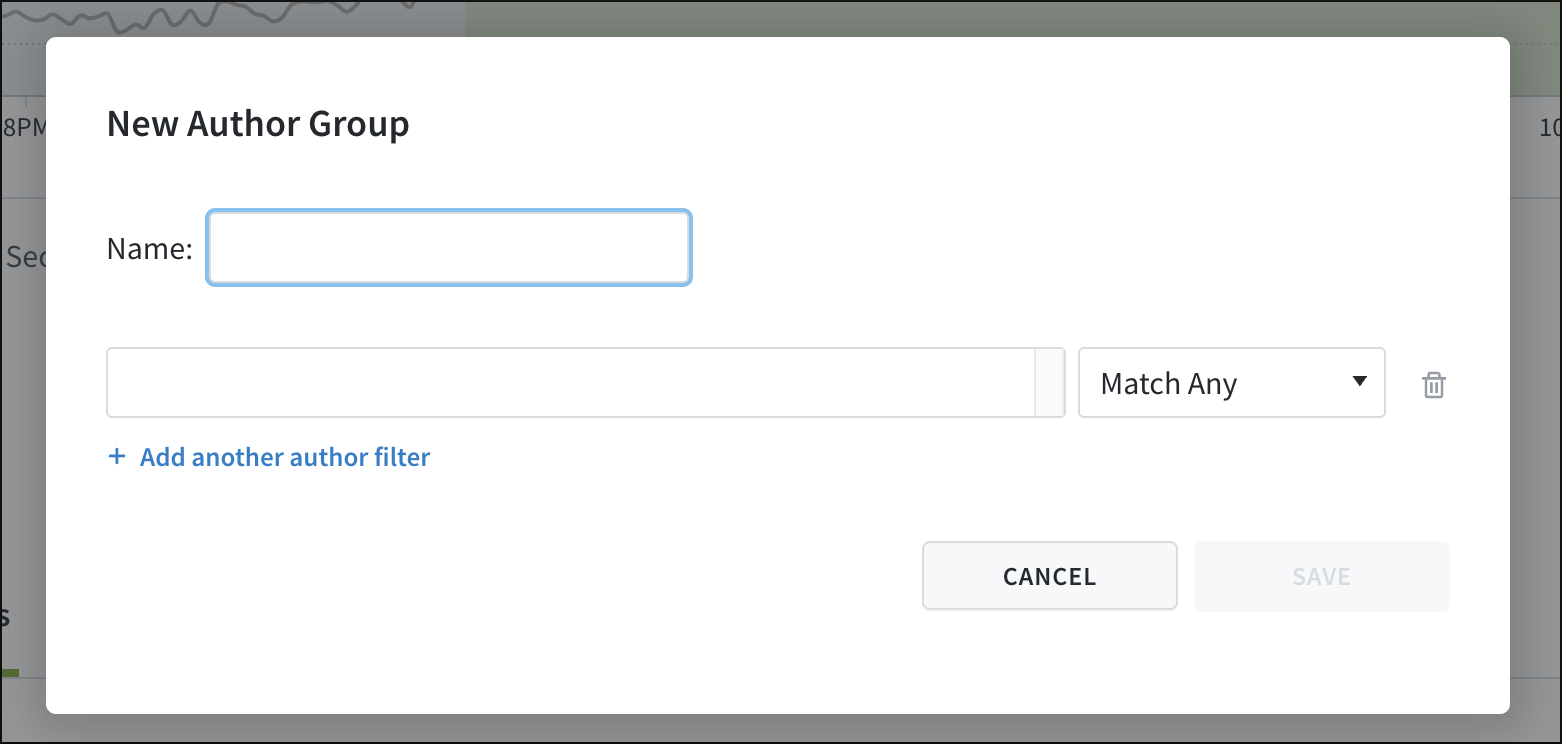
In the panel that opens, enter a name for the new group, then include or exclude group members using filtering logic.
Create campaign groups
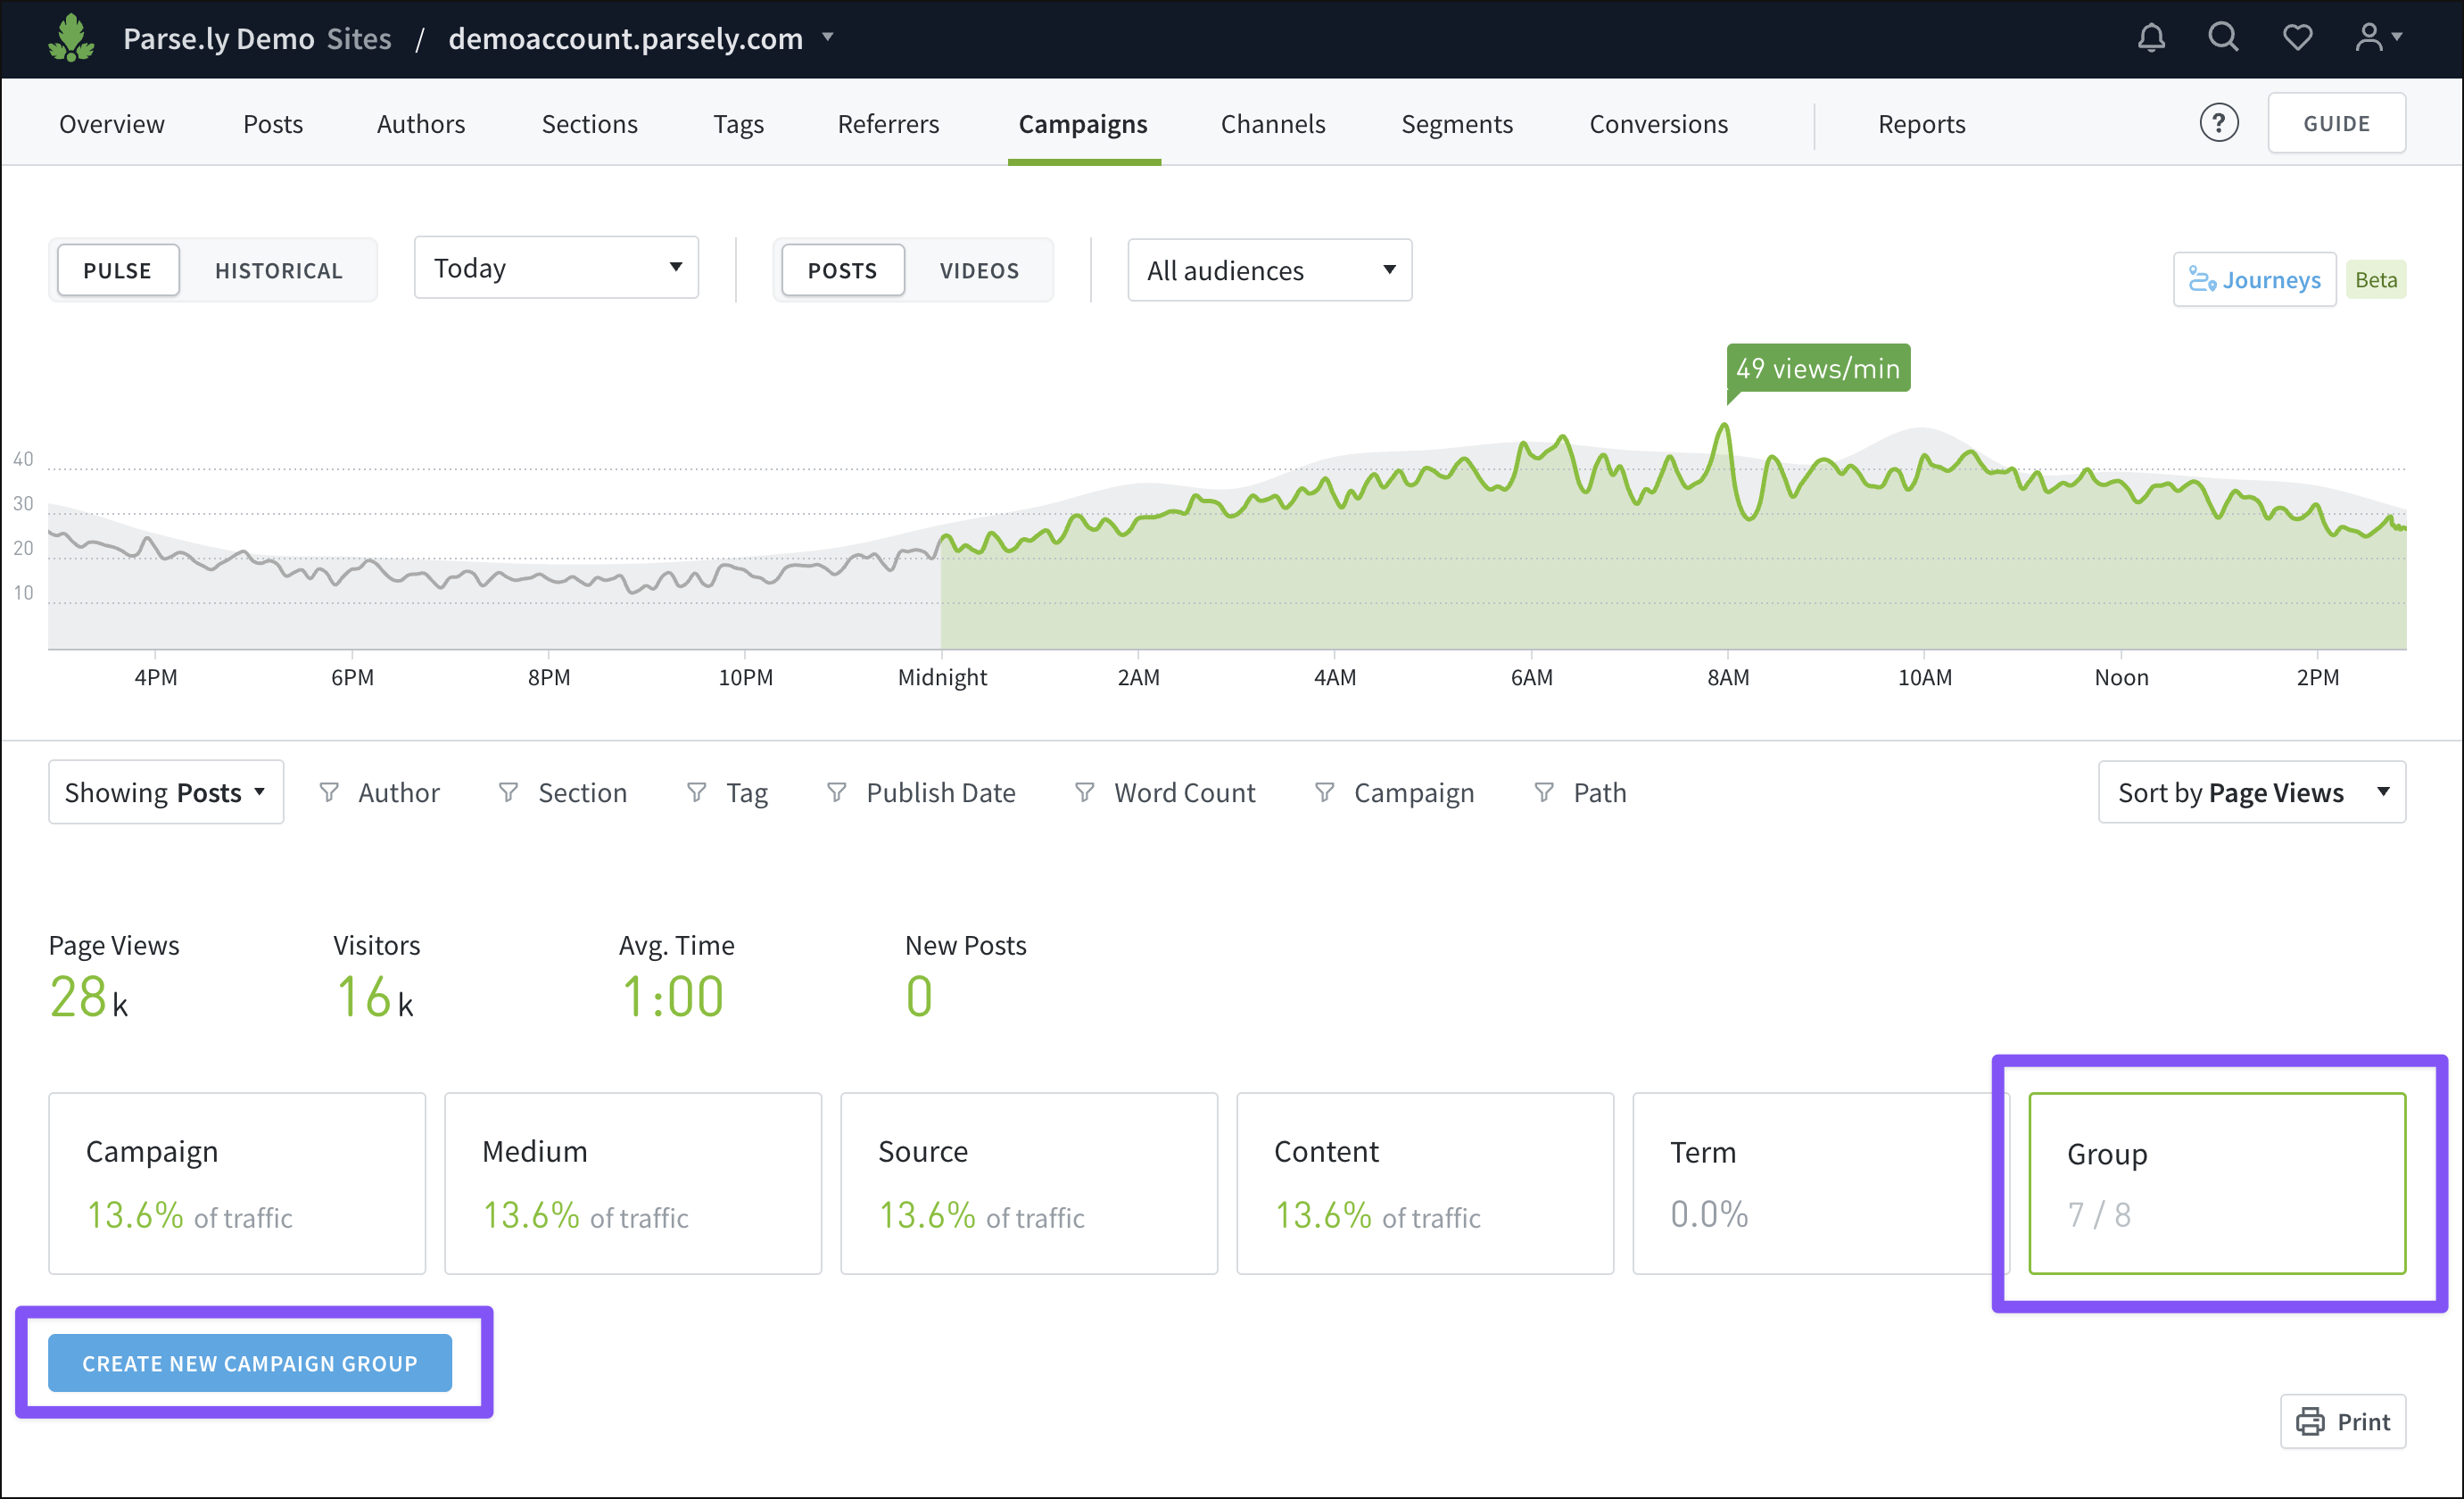
From the Campaigns tab of the Dashboard, click the Group tile, then the “Create New Campaign Group” button. Only site admins can create campaign groups.
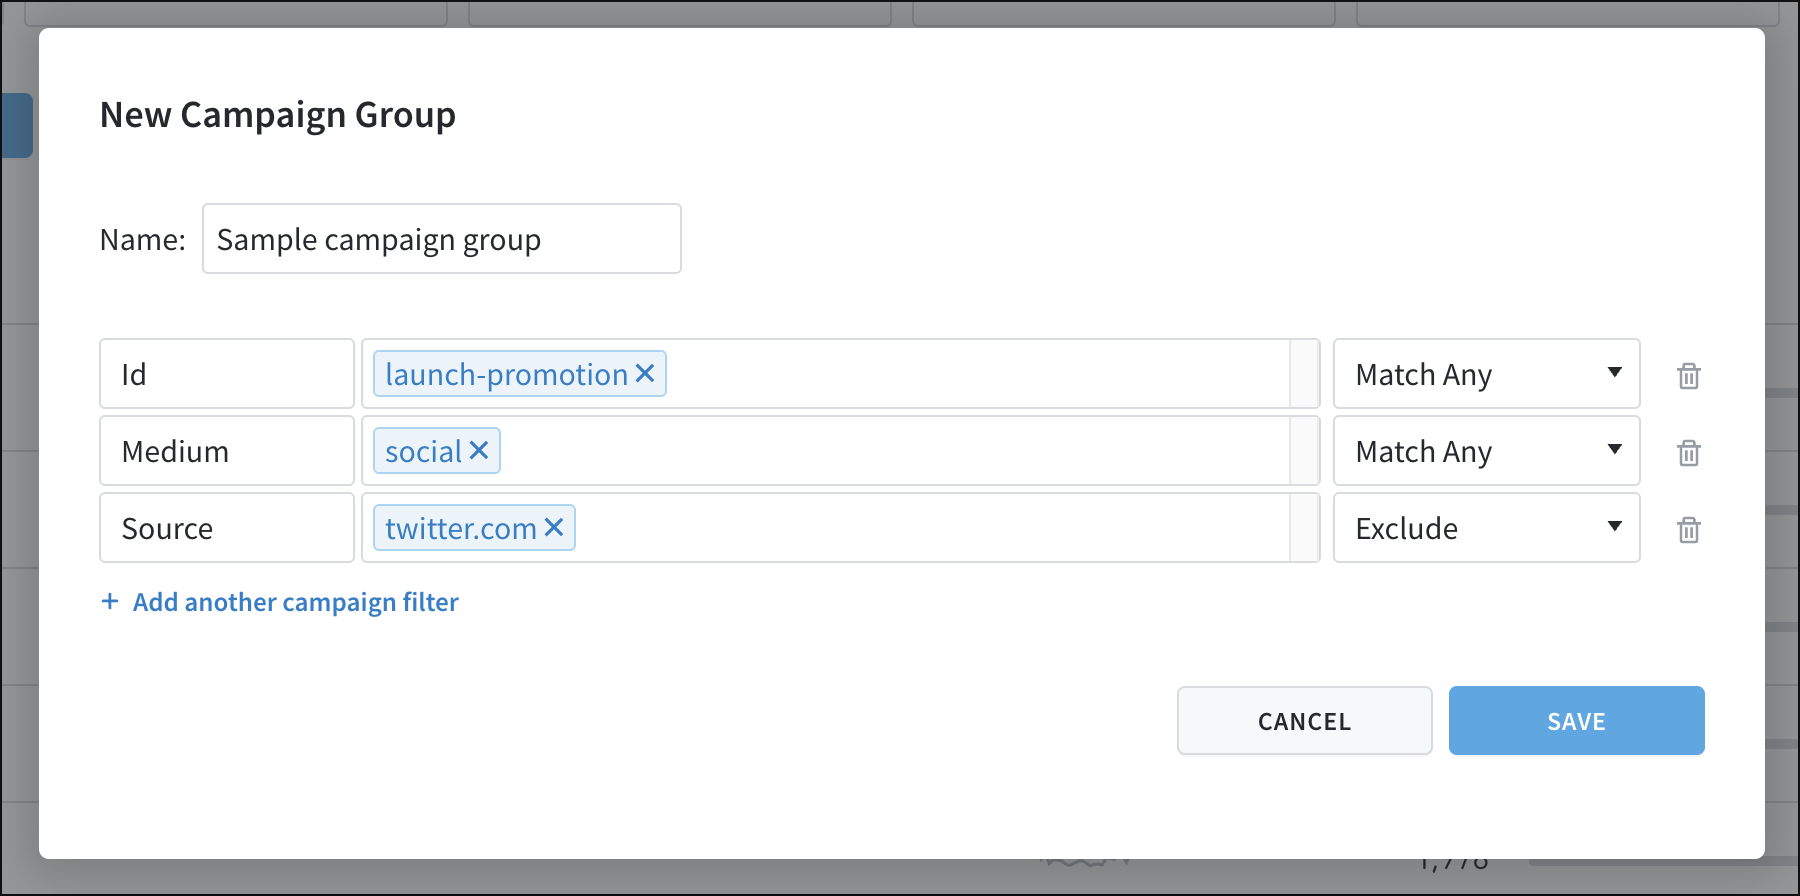
In the panel that opens, enter a name for the new campaign group. Filter the group by campaign ID, medium, source, content, or term — and multiple filters can be added — all using filtering logic.
Create site groups
To create a site group, a network admin should first visit the Network Rollup view of the Dashboard. From here, open the account menu at the top right of the Dashboard. Here, the “Site Groups” option brings up a page with existing site groups and the option to create a new group.

From the site groups page, the network admin clicks “Create Group” to bring up a panel where the new group’s details can be entered.
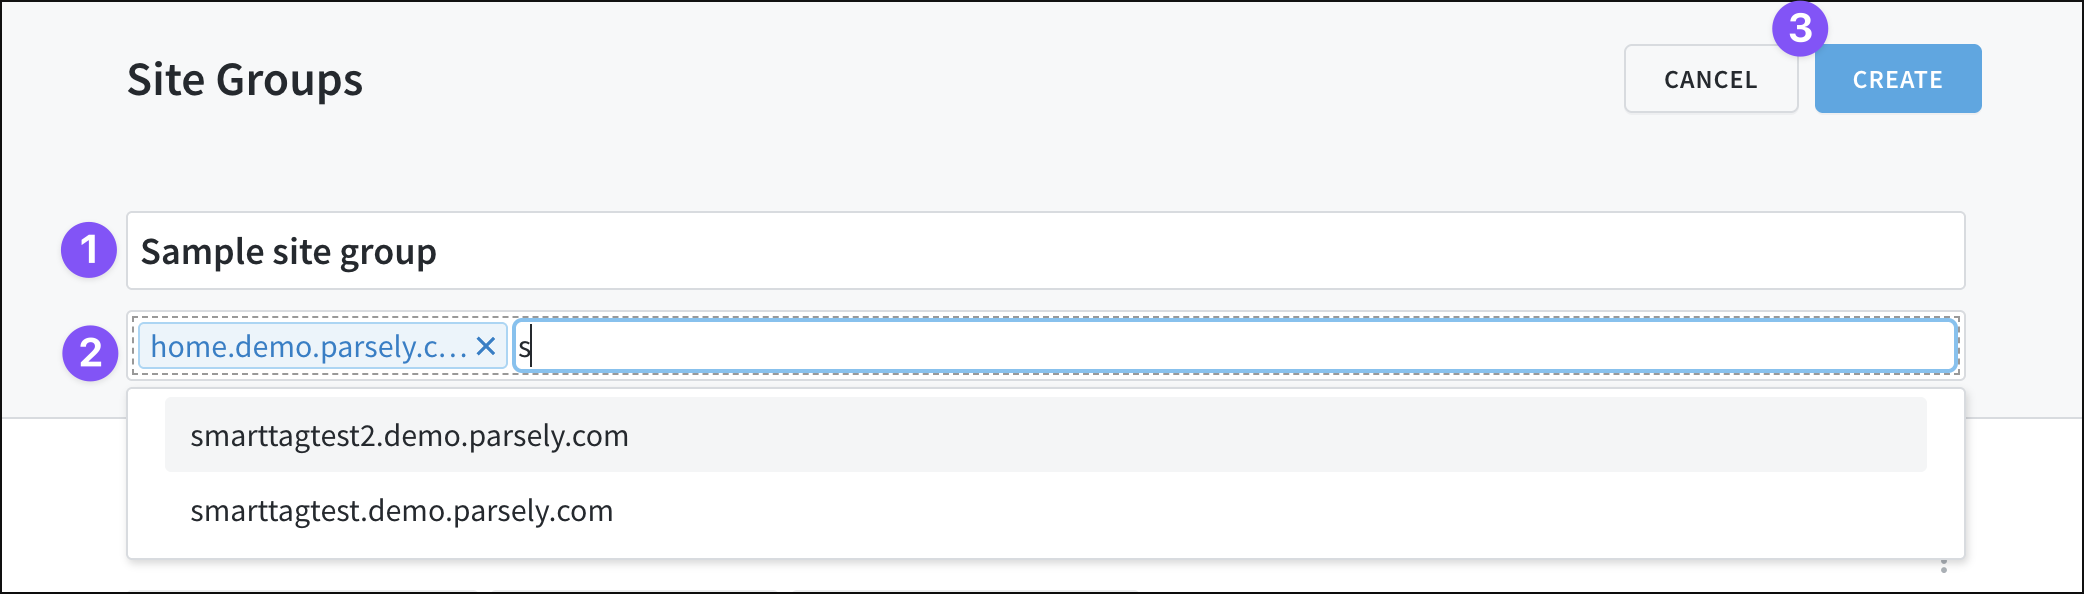
- Enter the new site group’s name.
- Add sites to the group by typing in the search box to find them, then clicking those that should be added.
- Click “Create” to save the group.
View group details
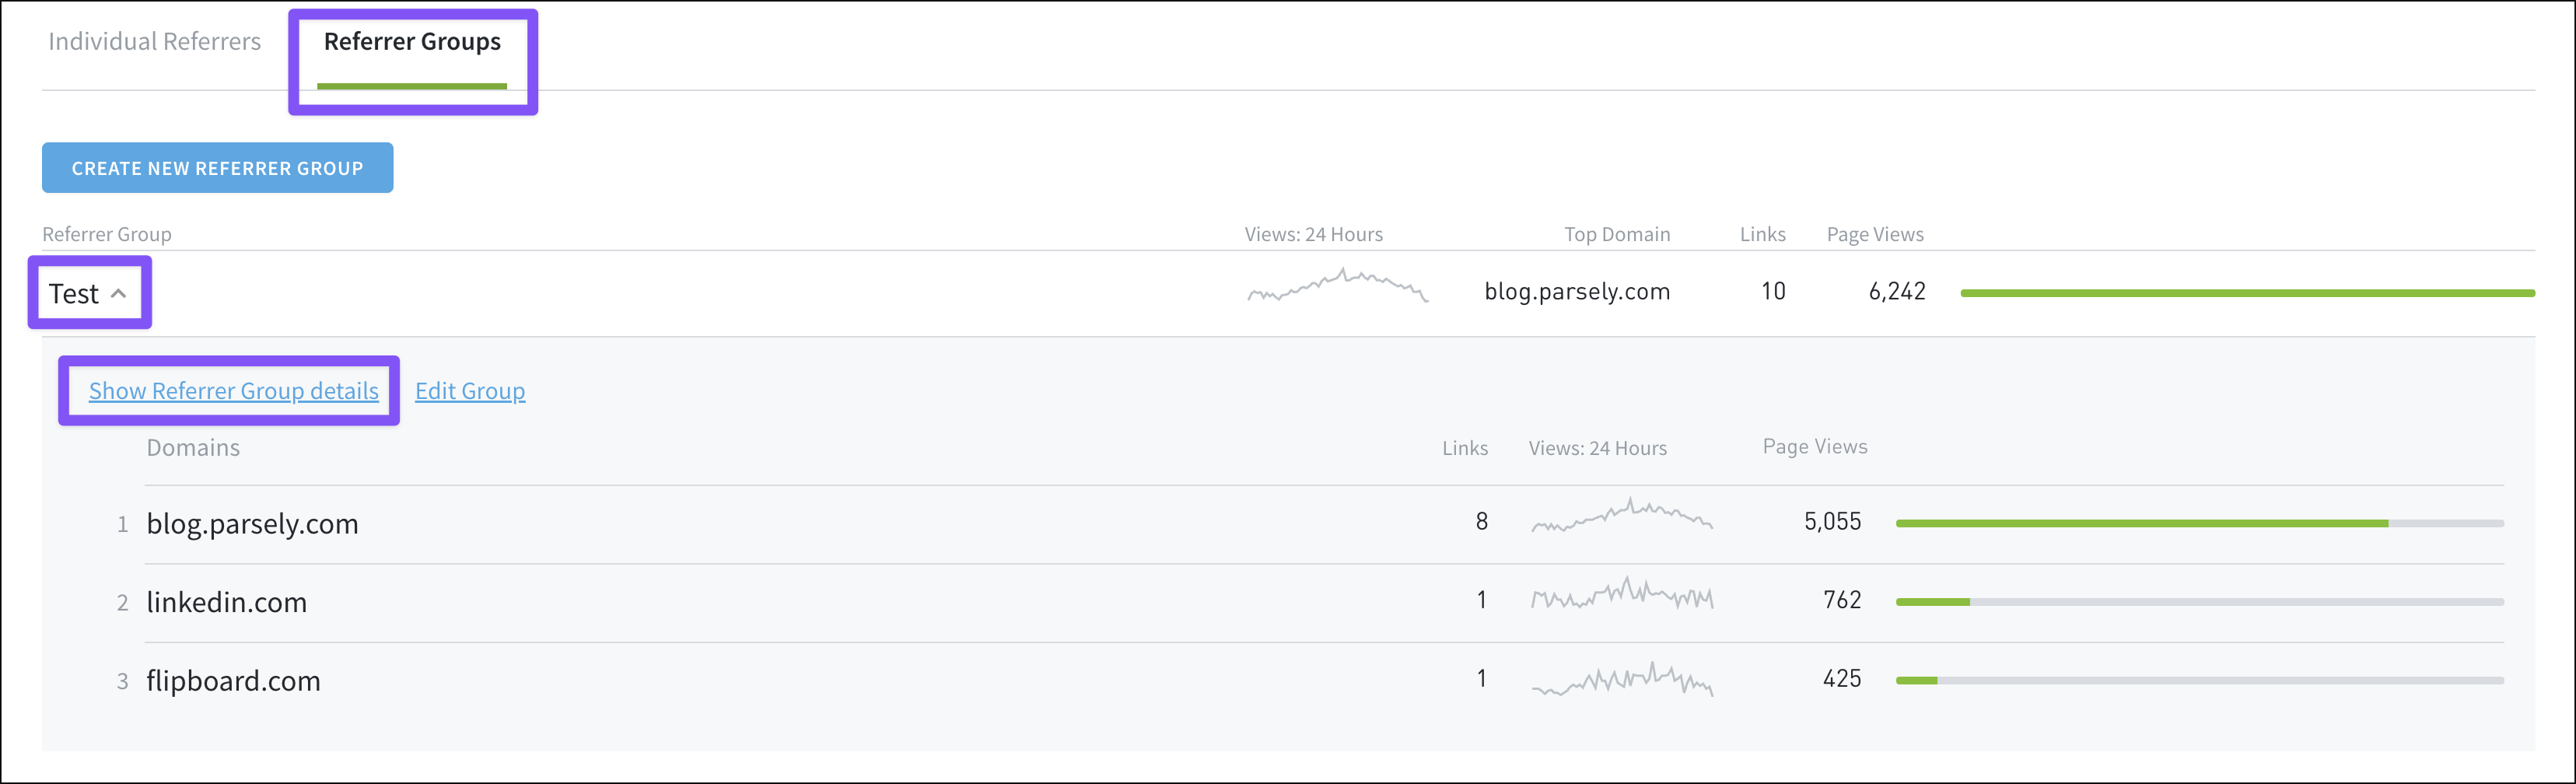
Clicking a group name from the list under the Groups tab on Authors, Conversions, Referrers, or Tags — or the list under the Group tile on Campaigns — opens a panel that displays the group’s members and individual data.
From this panel, clicking “Show Group details” takes you to that group’s details page.
For site groups, a network admin accesses the details page by clicking a group name from the site groups page in the account menu.
A group’s details page allows you to go in-depth with data for that group. The view here can be adjusted and filtered much like Dashboard tabs:
Edit or delete a group
From the list of groups on Authors, Conversions, Campaigns, Referrers, or Tags, clicking the name of a group opens a panel that lists individual group members, as well as the option to edit the group.
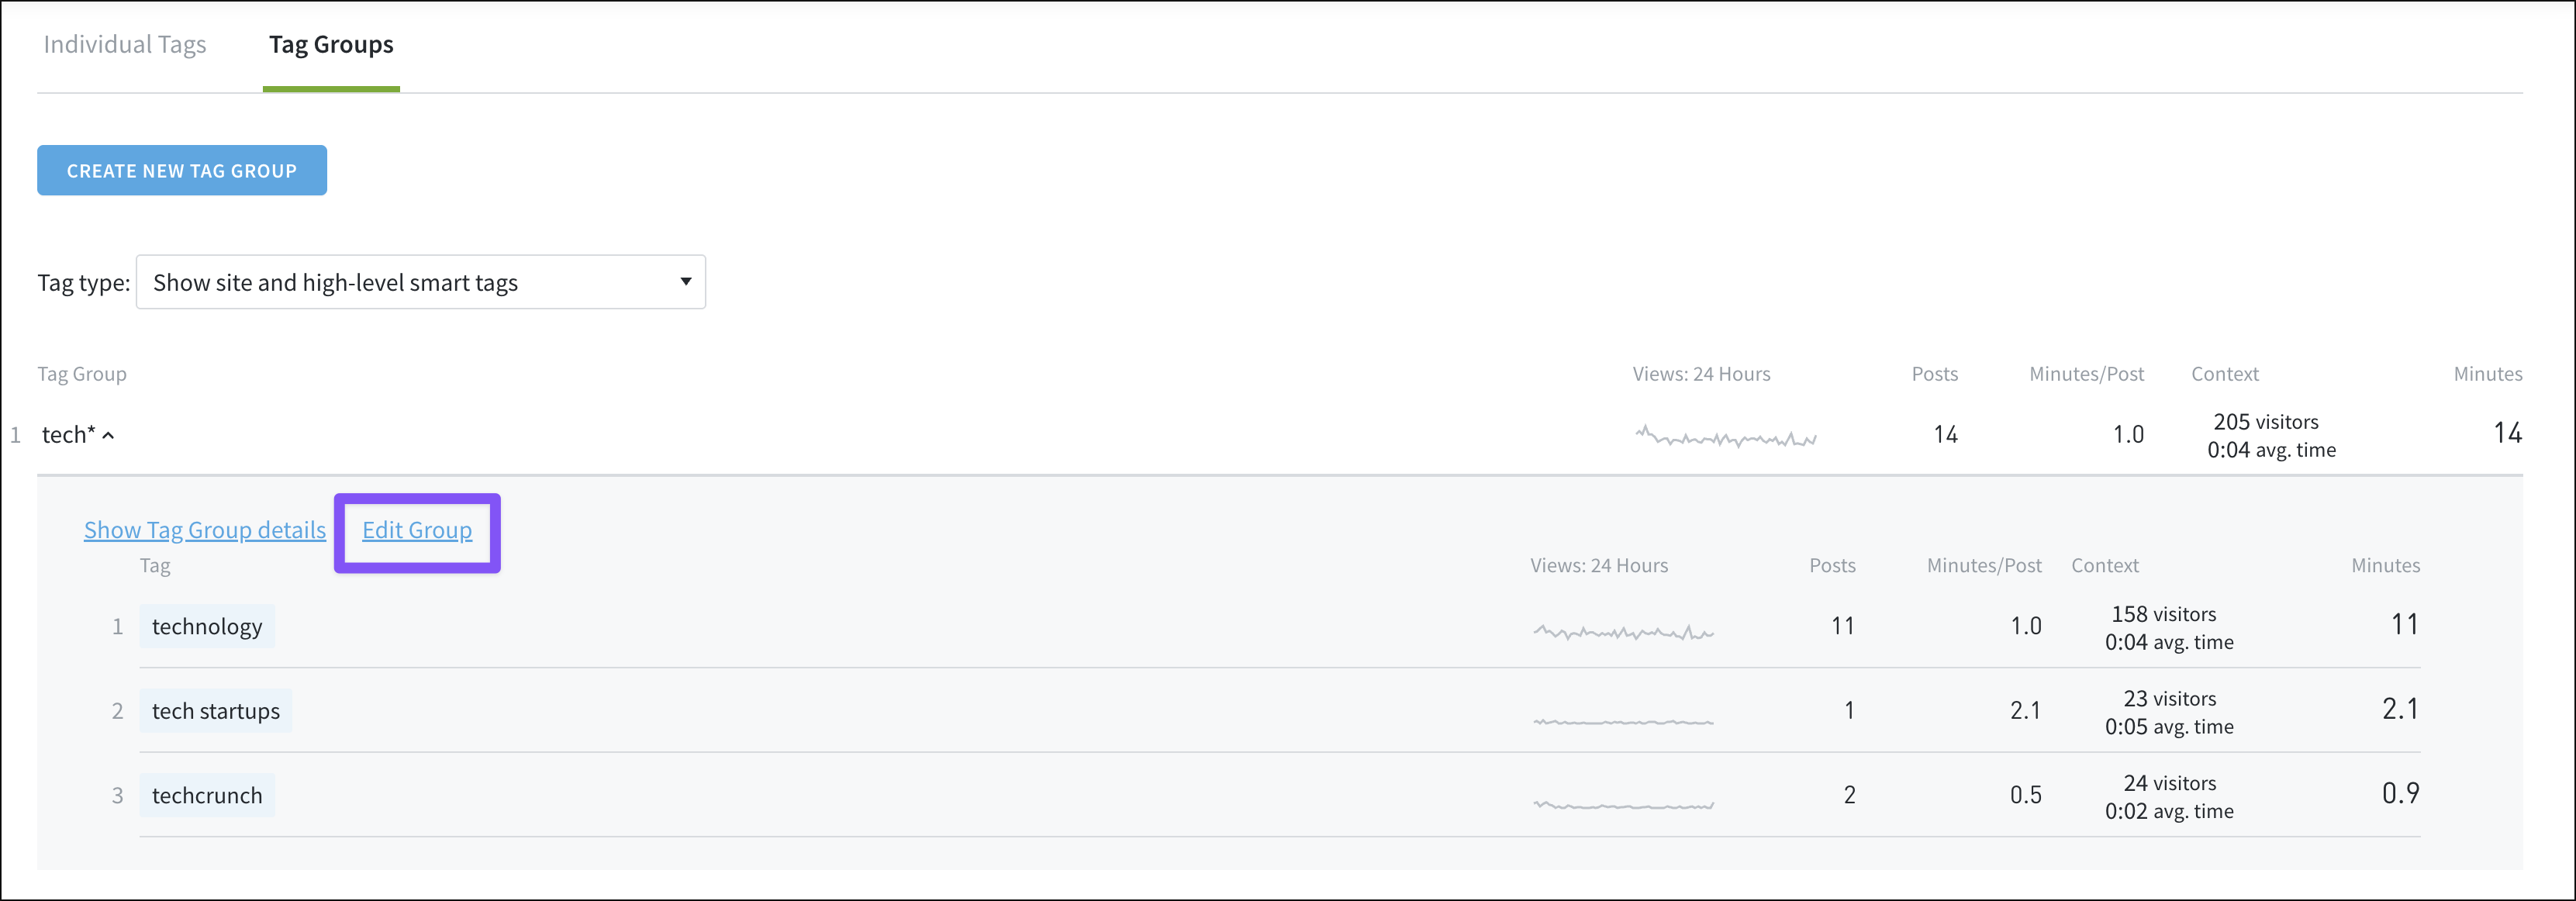
Clicking “Edit Group” brings up a panel to adjust group settings or delete the group entirely.
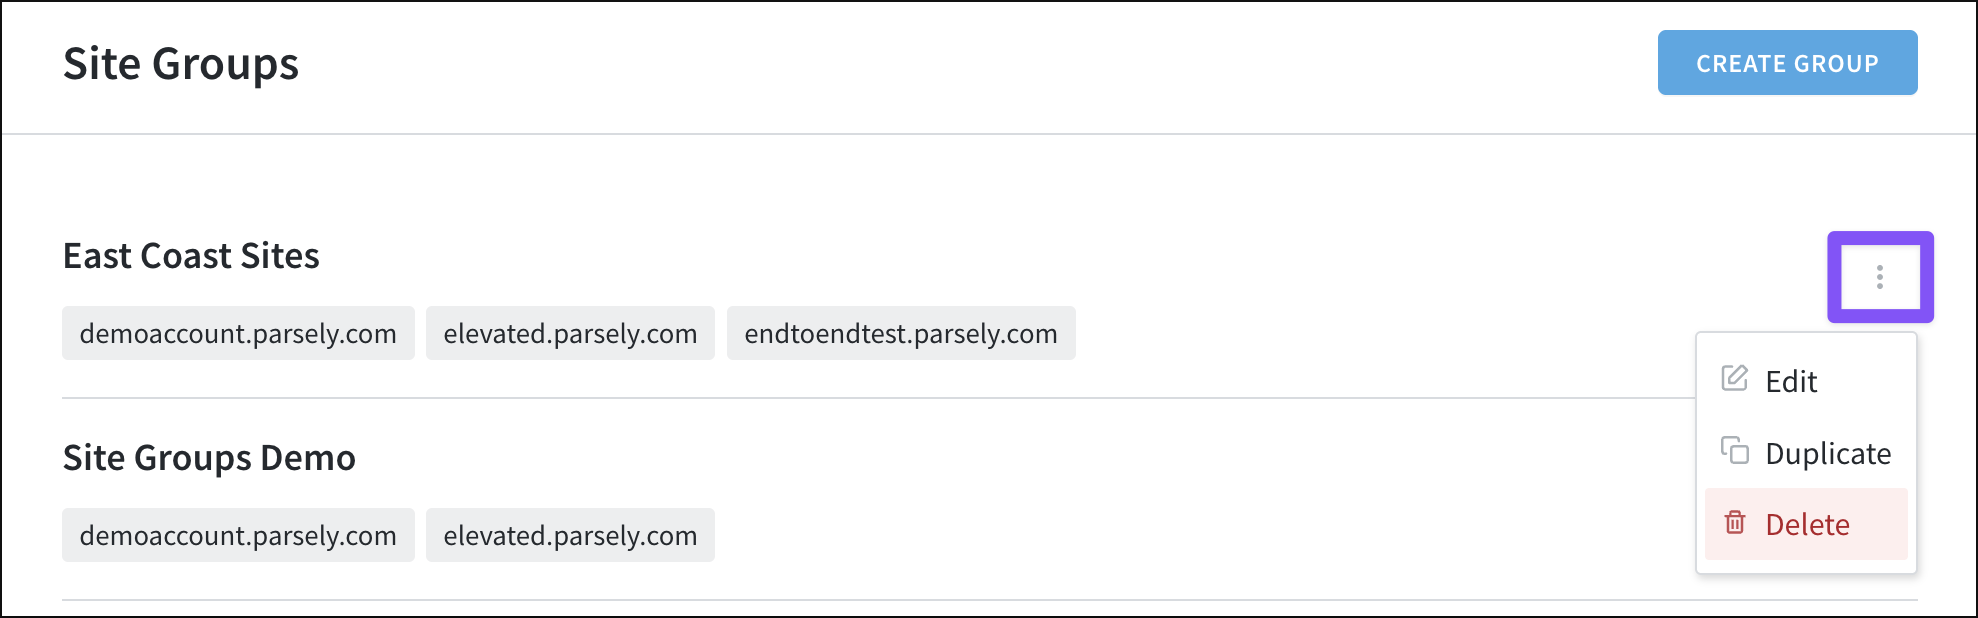
A network admin can edit site groups from the site groups page in the account menu. Click the three-dot icon to the right of a site group name to bring up options to edit, duplicate, or delete the group.
Last updated: July 07, 2025