User Management
The User Management page is a place where admins can invite, remove, and edit users. If you are not a site or network admin, you can find a list of your admins on the User Settings page. Parse.ly employees cannot grant access to accounts without an admin’s express approval.
Are you having trouble logging into your dashboard? Try our Dashboard Troubleshooting Guide.
Note
It’s easier to add new users or modify existing users by first visiting your Network rollup.
Invite users
Walkthrough

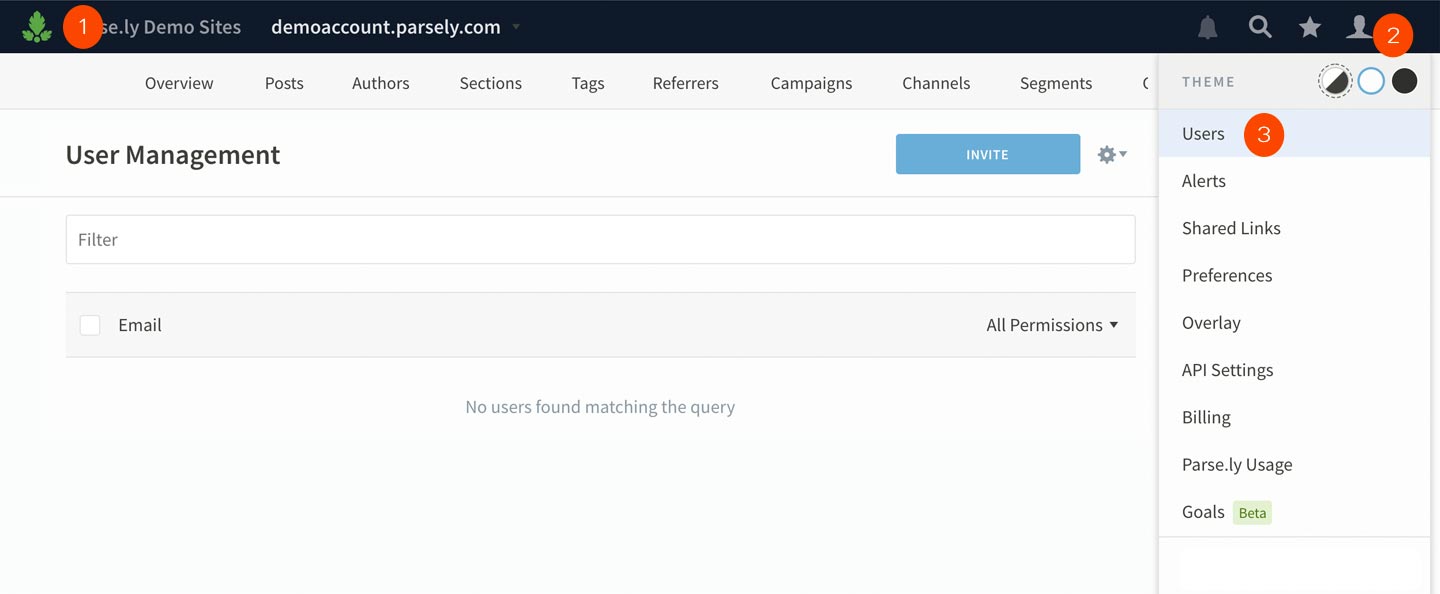
- In the top-bar, click the account silhouette icon👤 to enable the drop-down menu
- Click Users.
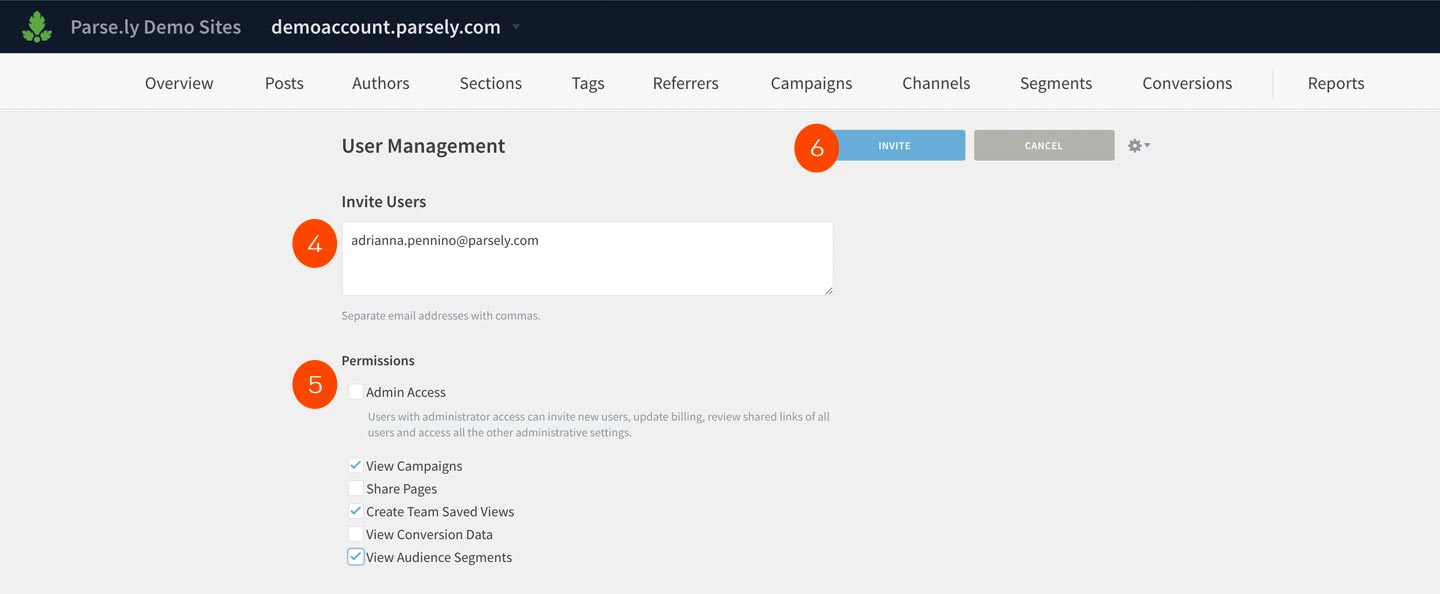
- Click Invite.
- Enter the email addresses of the people you want to invite.
- Click the checkboxes to give permissions to certain features. All permissions are automatically turned on for admins. Read more about Roles and Permissions here.
- Click Invite.
The email addresses will receive an invitation from our system with log-in instructions. However, if you’re trying to invite someone who already has Parse.ly access, they will not receive an invite. If you’re not sure whether they’re in the system, review your list of users. And if they need help logging in, please direct them here.
Resend an invite
If an invited user hasn’t logged in yet, you can resend their invite.
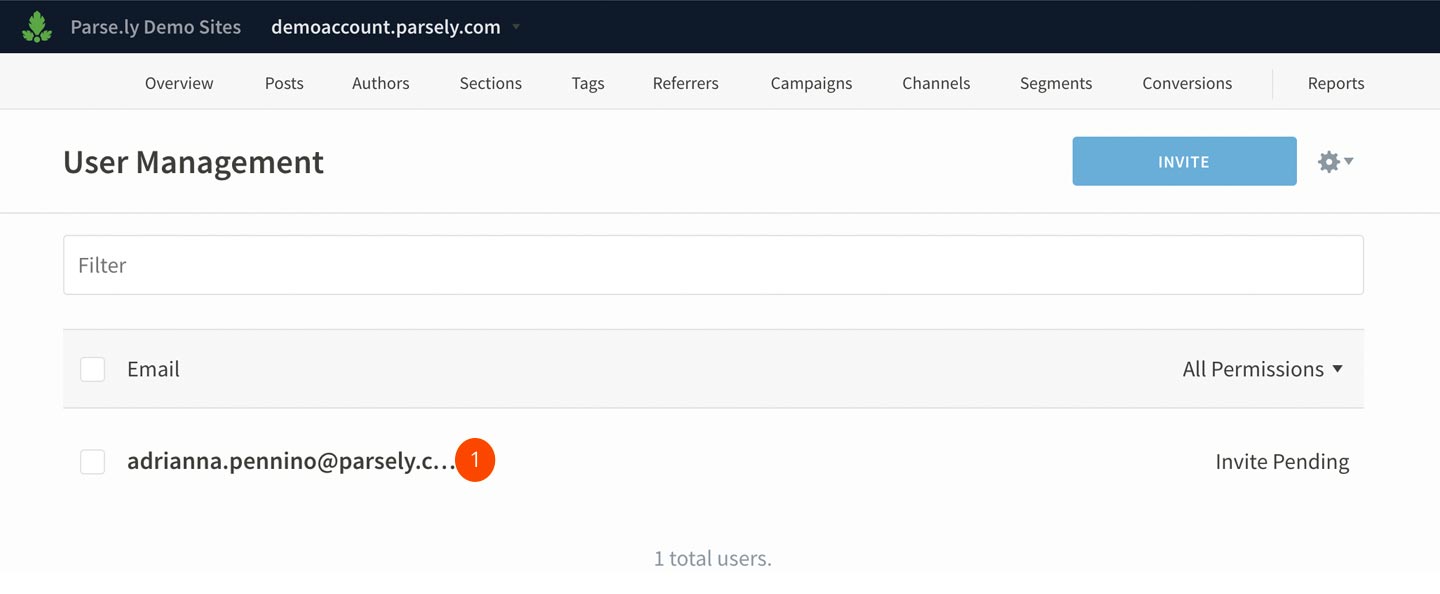
- Click the user’s email address. A modal window will pop.
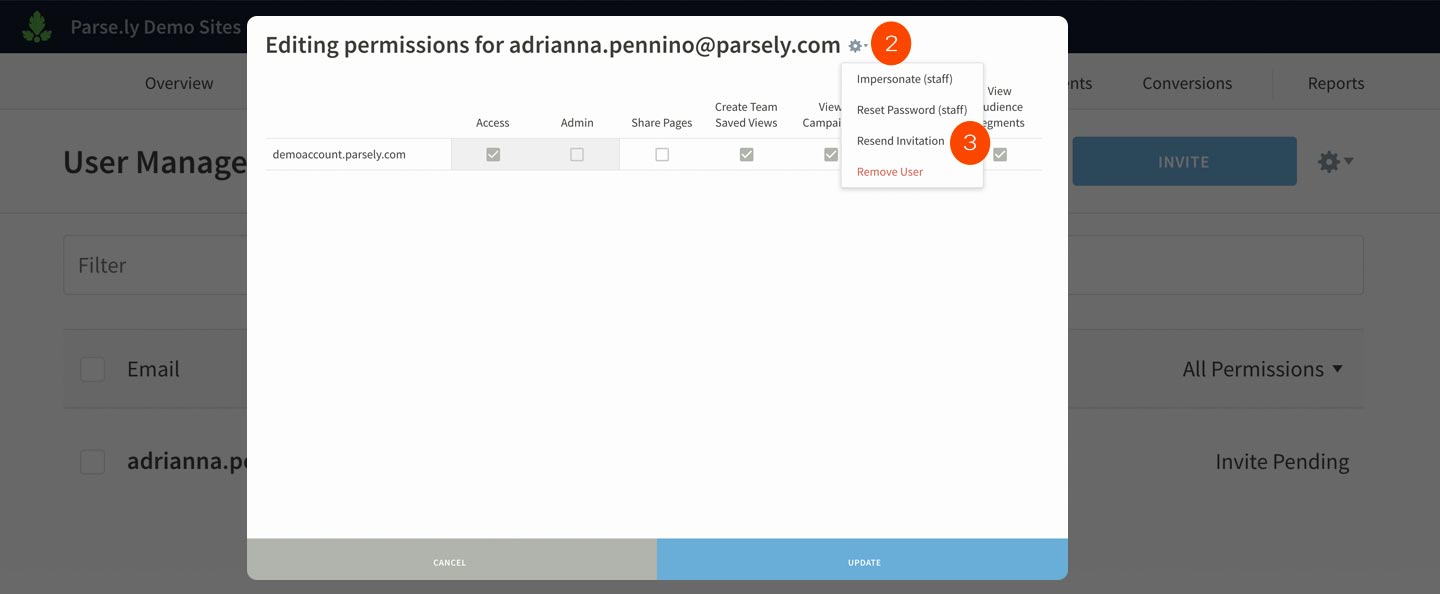
- Click the gear icon⚙️ next to email address.
- Click Resend Invitation.
Remove a user
You may want to delete a user’s account if they’ve left your organization.
- Click the user’s email address.
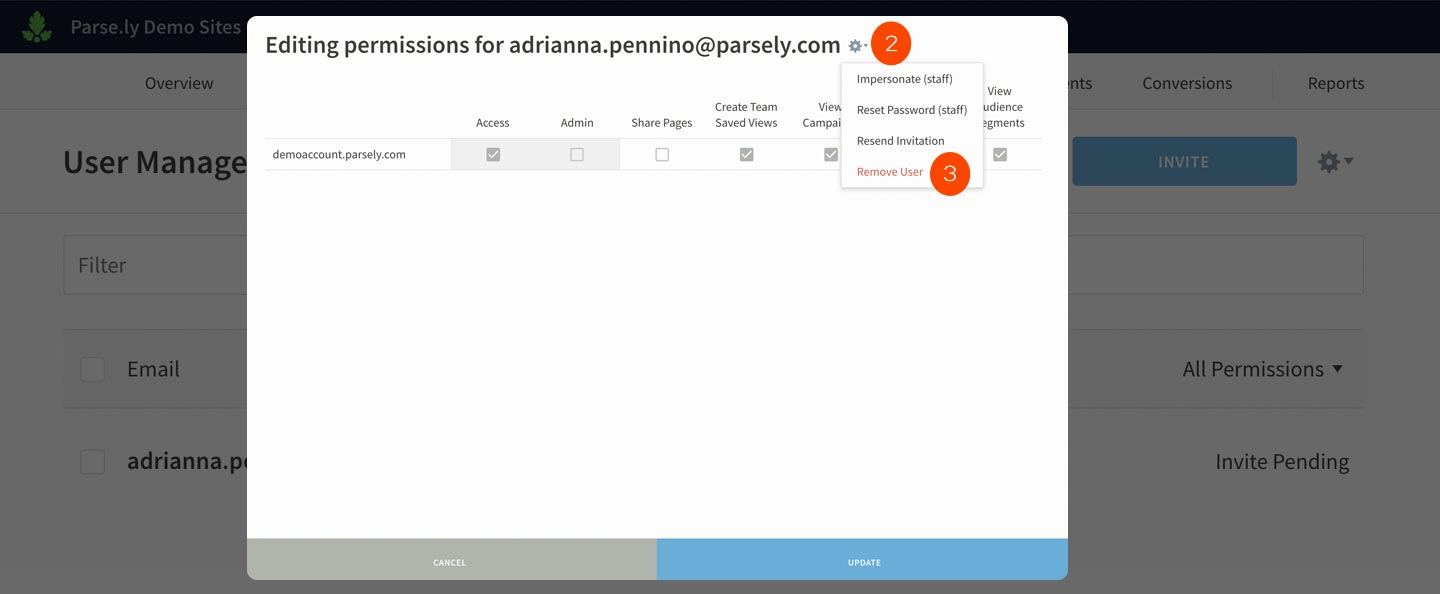
- Click the gear icon⚙️ next to email address.
- Click Remove User.
Grant or revoke site access & permissions
You can grant or revoke access to the sites of which you’re an admin.
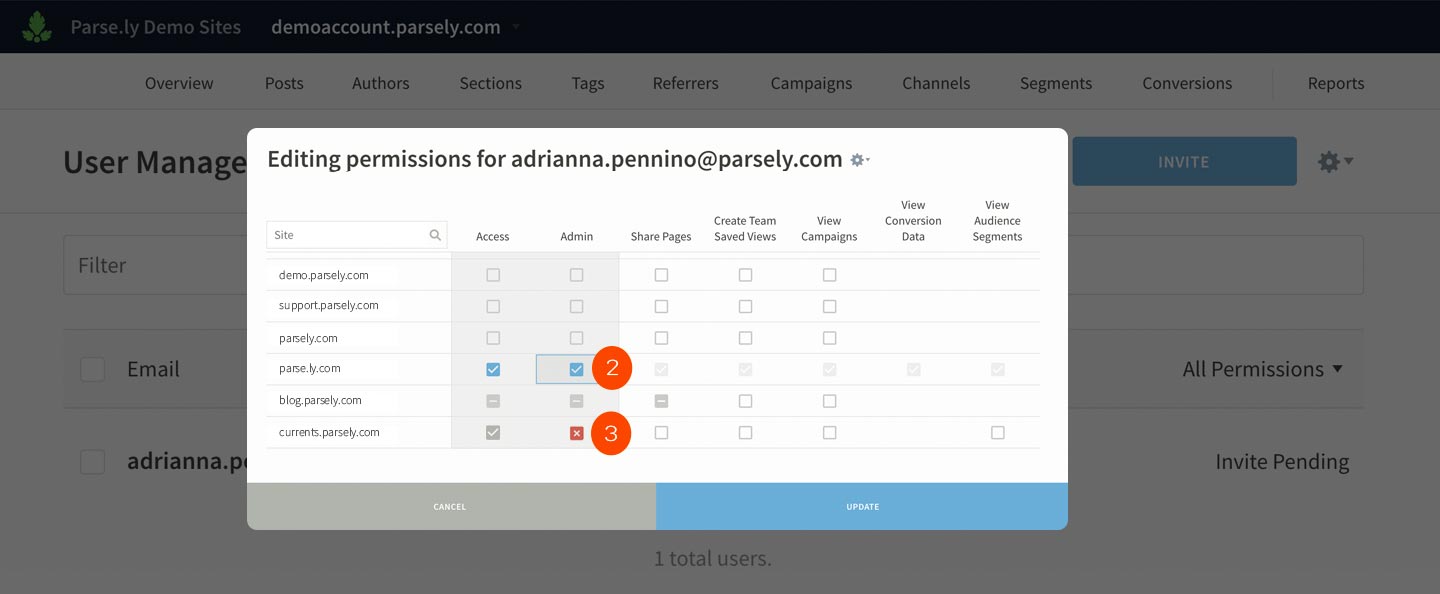
- Click the user’s email address.
- Click the name of a site to grant access, admin privileges, or permissions.
- Click over the ✓ to revoke access or privileges.
- ✓ means the selected user has access to this dashboard or feature.
- X means access/privilege is revoked by you.
- – means the selected user has access to the dashboard or feature.
- No symbol (a blank checkbox) means the selected user does not have access to the dashboard or feature.
Definitions of user permissions
- Share Pages allows the user to do this.
- Create Team Saved Views allows users to create saved views that are visible to other users. Without this permission, a user can only create an individual saved view for their account.
- View permissions allow you to see campaign data, conversion data, and audience segments (when applicable).
Make a user a network admin
If you’re a network admin, you can make other users admins for all the sites in your network.

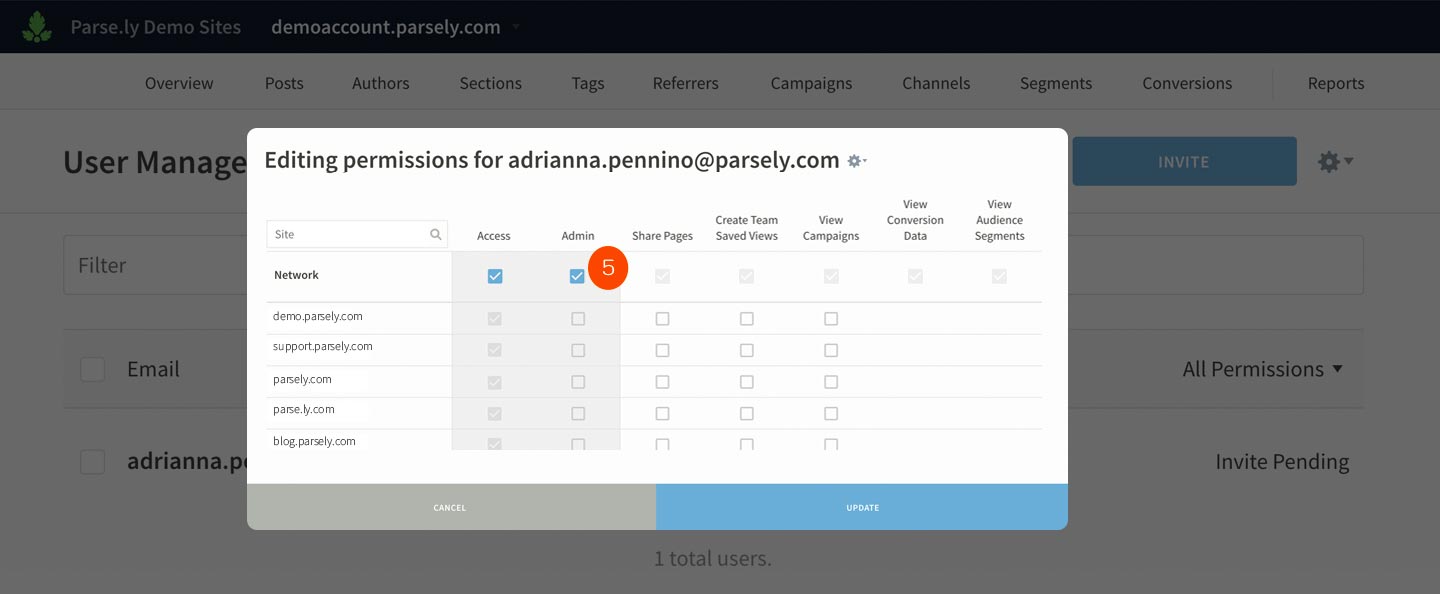
- Go to your network level.
- In the top-bar, click the account silhouette icon👤 to enable the drop-down menu
- Click users.
- Click user’s email address.
- Click the checkbox below “Admin” at the “Network” Row.
- Click Update.
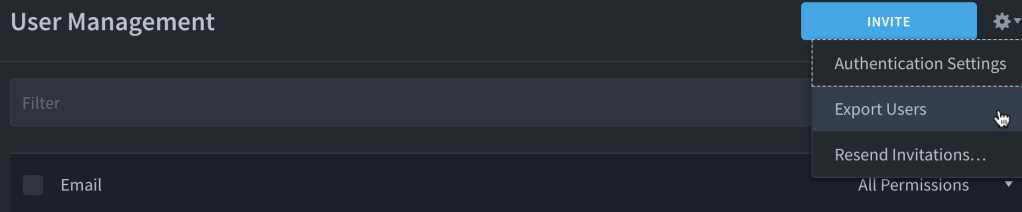
Authentication Settings
Clicking the cog icon ⚙️ next to the Invite button reveals a menu where you may select “Authentication Settings”. If purchased and integrated, this would enable you to use a third-party single sign-on. That would connect Parse.ly authentication to any service using SAML 2.0 standard.
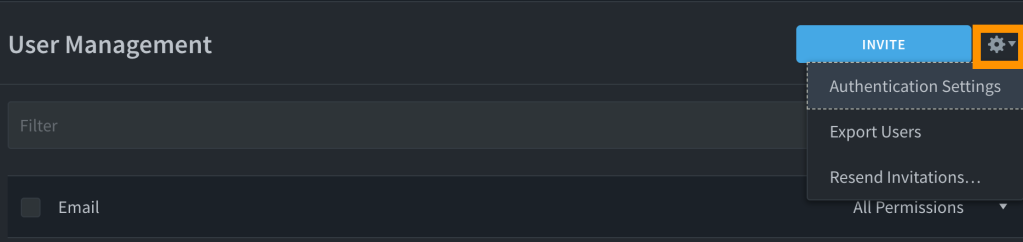
Export Users
Clicking the cog icon ⚙️ next to the Invite button reveals a menu where you may select “Export Users”.
Clicking “Export Users” will download a CSV file containing:
- User Email
- Last Accessed (date of)
- Site (“Network” or one or more Site IDs)
- Invited By (email addresses of inviter)
- Invite Date
- Admin (“Yes” or empty)
- Share Pages (“Yes” or empty)
- Create Public Saved Views (“Yes” or empty)
- View Campaigns (“Yes” or empty)
- View Conversion Data (“Yes” or empty)
Last updated: January 08, 2024