Parse.ly Integration
Whether you’ve already made your purchase or you want a summary of the process before starting, these are the steps for Parse.ly integration.
- Receive one “sandbox” Site ID and one, or more, production Site IDs from Support.
- If using the sandbox Site ID, inform Support of the domain you’re installing Parse.ly.
- Install the tracking code.
- Test pageview events.
- Send metadata.
- Validate metadata.
- Admins, adjust your preferences.
- Admins, invite your teammates.
- Read our Getting Started Guide and contact your Relationship Manager for training.
- If your contract contains premium features, install them.

We will send you your Site ID 
You’ll choose a tracking script injection method, like GTM, and insert your Site ID 
Our tracking script, with Site ID, will appear in your HTML 
Visitors will trigger pageview events when visiting your site 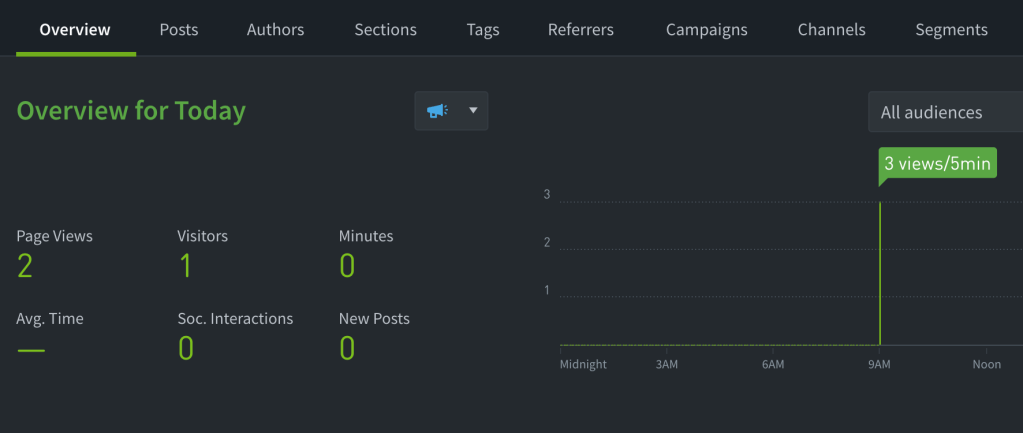
Parse.ly will receive and display your pageviews and then assign them to your Site ID 
Parse.ly will then scan your HTML to find the metadata you’ve placed there 
The metadata we receive should match what you’ve mapped to your CMS 
Once we’ve crawled your site for metadata we’ll associate it with your pageviews. 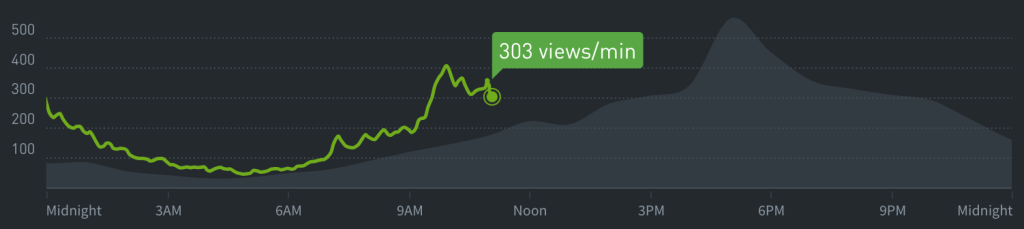
As time goes on and your traffic increases, you’ll see historical comparisons in your dashboard. 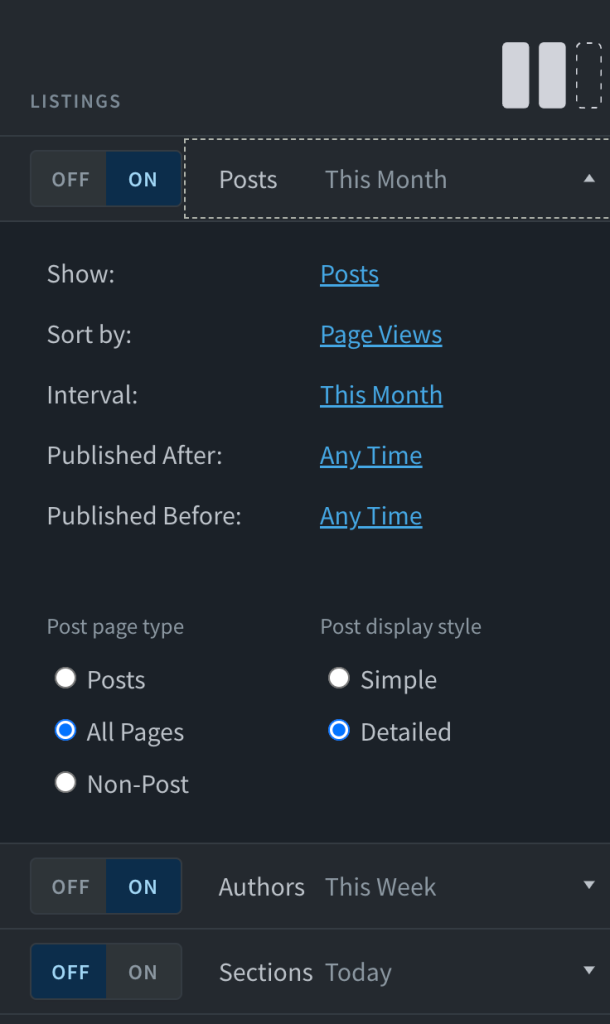
As you become familiar with your Dashboard, you can find ways to customize everything to meet your needs.
Step 1: Receive Site IDs
An Account Executive will work with your team to determine your needs and how Parse.ly can solve them. This person will also coordinate set up of your Parse.ly dashboards. They will contact the Parse.ly Support team and provide contract details.
The Support team will then create Parse.ly Site IDs and enable the features that you’ve purchased. Your team will need these Site IDs when it is time to install tracking (Step 3).
You’ll receive emails from:
- Parse.ly (support@parsely.com) — this is where we’ll provide your Site IDs and personalized instructions.
- Parse.ly (app@parsely.com) — Parse.ly Support will invite the first batch of Parse.ly Admins
Step 2: Use the Sandbox
This is an optional step. However, we encourage using the sandbox for testing. Read our sandbox instructions here. You’ll be performing all the same steps identified below.
Step 3: Install tracking
In most cases, we recommend using Google Tag Manager to install our JavaScript Tag on your site. Click here to see a full list of options. You will be using the Site ID provide in Step 1.


Some sites may require special configuration to account for Single-Page Applications or dynamic tracking. Click here to see if any of these special cases apply to your site.
Step 4: Test
Shortly after installing our tracking code on your pages, your site will start generating pageview events. Read our testing instructions to validate those pageviews in your browser.

Minutes after your site begins sending pageviews, you should see them in your Parse.ly Dashboard.
Step 5: Send metadata
If your CMS is WordPress, we recommend using the WordPress Parse.ly Plugin. By following these instructions, you may use the plugin with GTM tracking (from Step 3).
If you are not using WordPress, review our metadata requirements.
Regardless of your CMS, the objective is the same. We want to take information, like the author of a post, and gain meaningful insights from there. For example:
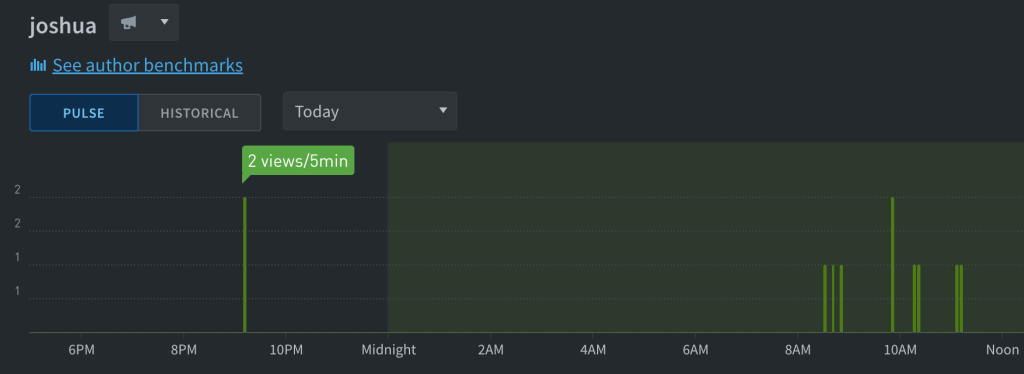
The WordPress Post editor has an Author field. In the screenshot below, I’ve selected my name.

Now the wp-parsely plugin will extract this information out of WordPress and will display it in the form of a meta tag within the HTML of the post.

Once Parse.ly receives that first pageview event (depicted in Step 4), we will crawl the url to get the metadata. We then associate the pageview information with the metadata for a complete picture in the Dashboard.
Step 6: Validate metadata
Review the listings in your Dashboard to ensure the metadata matches your expectations. We have a validator tool that you may download at the Chrome Web Store.
Step 7: Adjust Preferences
Admins should review the Preferences menu and make suitable adjustments for their team. You may access the menu in your dashboard and follow these instructions.
To see more information about Account settings, review our documentation.
Step 8: Invite teammates
Admins should invite their teammates using these instructions.
Step 9: Training
When your satisfied with the integration of your Parse.ly Dashboard, contact your Relationship Manager to discuss training. In the meantime, download our Getting Started Guide, read through our Dashboard Features documentation, and explore these tools that come bundled with your Dashboard:
- Alerts: set up alerts of significant activity
- Automatic Metadata Change Detection: ask and it’s yours (in lieu of manual recrawl)
- Benchmarks: compare authors, sections, and tags with others
- Campaign Tracking: view the campaigns from your UTM/ITM parameters
- Comparison Mode: compare results across time
- Goals: define your goals and achieve them as a team
- Open in Parse.ly Bookmarklet: content to dashboard in one click!
- Overlay / Slot Tracking: designed for high-traffic home pages (multiple clicks in 10-minutes)
- Referrers: see where your traffic is coming from
- Reports: create a one-time or recurring reports on the metrics you care about most
Step 10: Add-on features
After your Parse.ly Dashboard integration and testing, you may continue installing add-on features in any order.
Add-on features include
- API (premium)
- Audience Segments (premium)
- Channels
- Apple News (premium)
- Google AMP
- SmartNews
- Mobile App Tracking (premium)
- Conversions (premium)
- Data Pipeline (DPL) (premium)
- Network Syndication
- Single Sign-On (SSO) (premium)
- Video Tracking (premium)
Last updated: February 07, 2024